How to Make a Halloween Snake Wreath


As an Amazon Associate I earn from qualifying purchases.
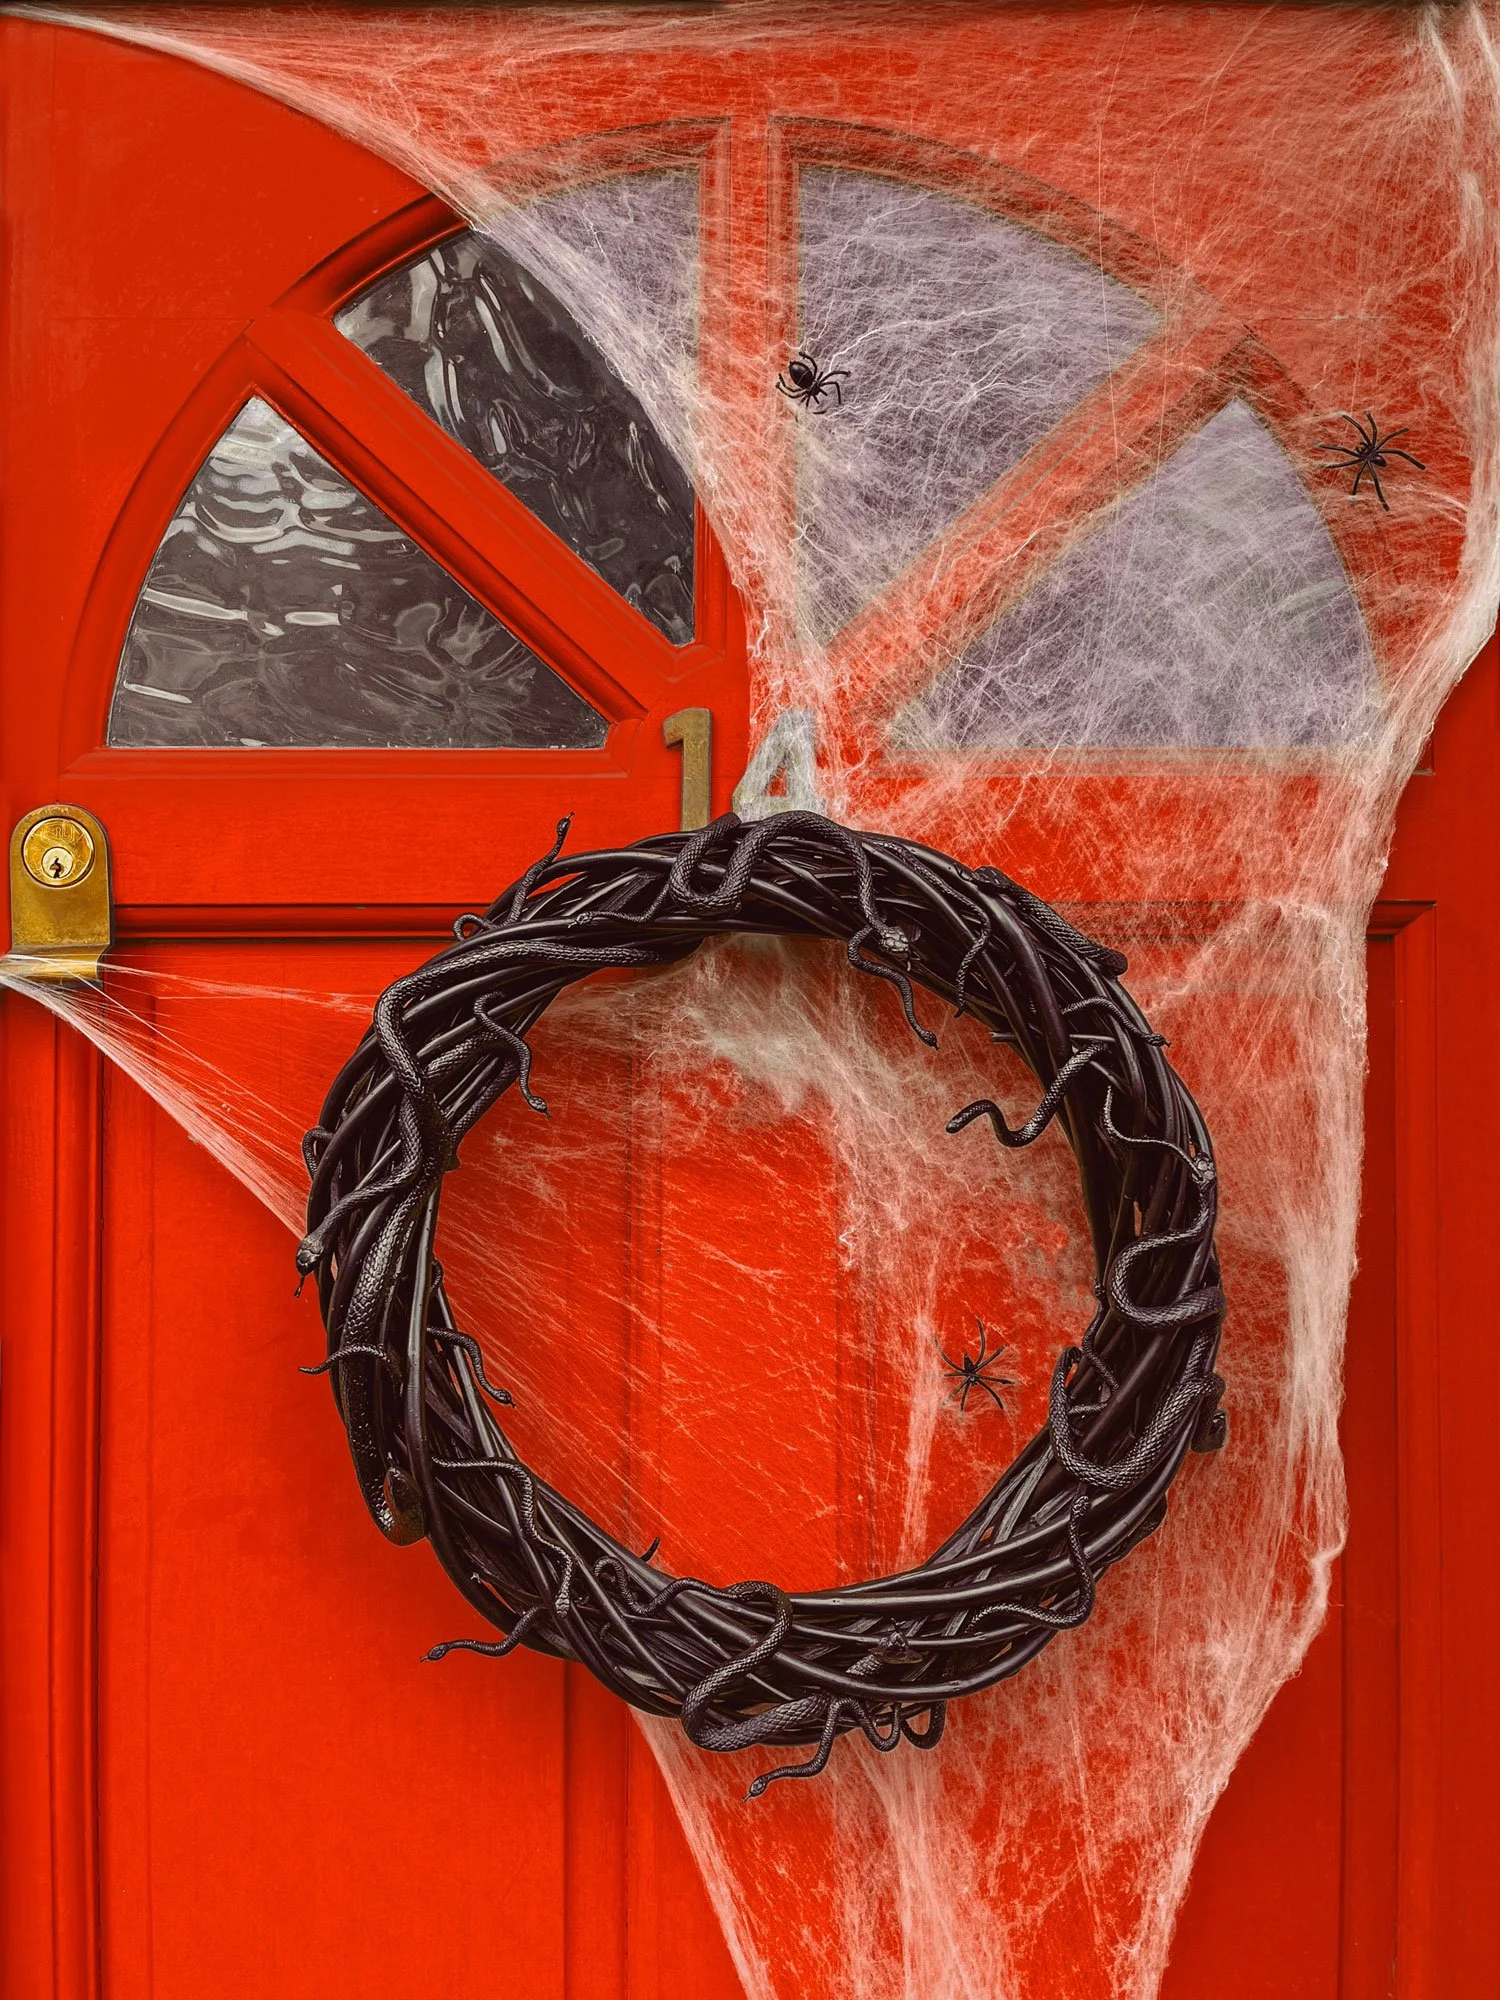
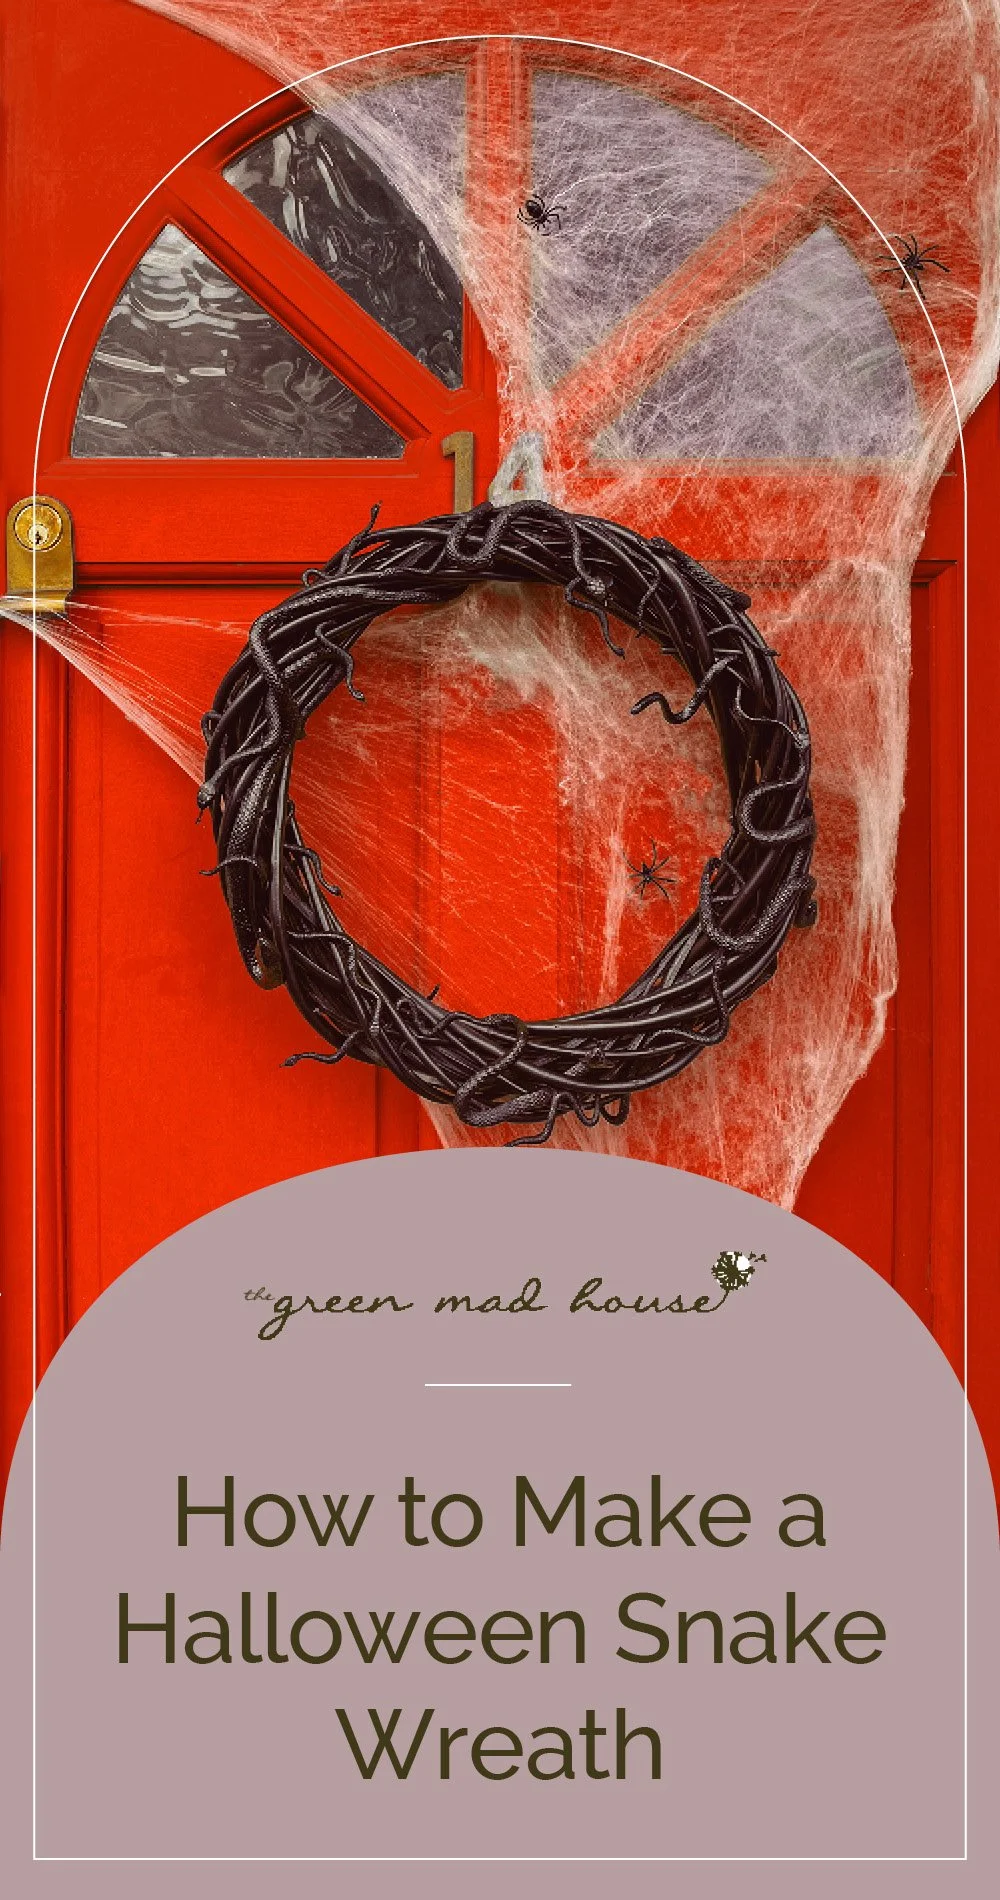
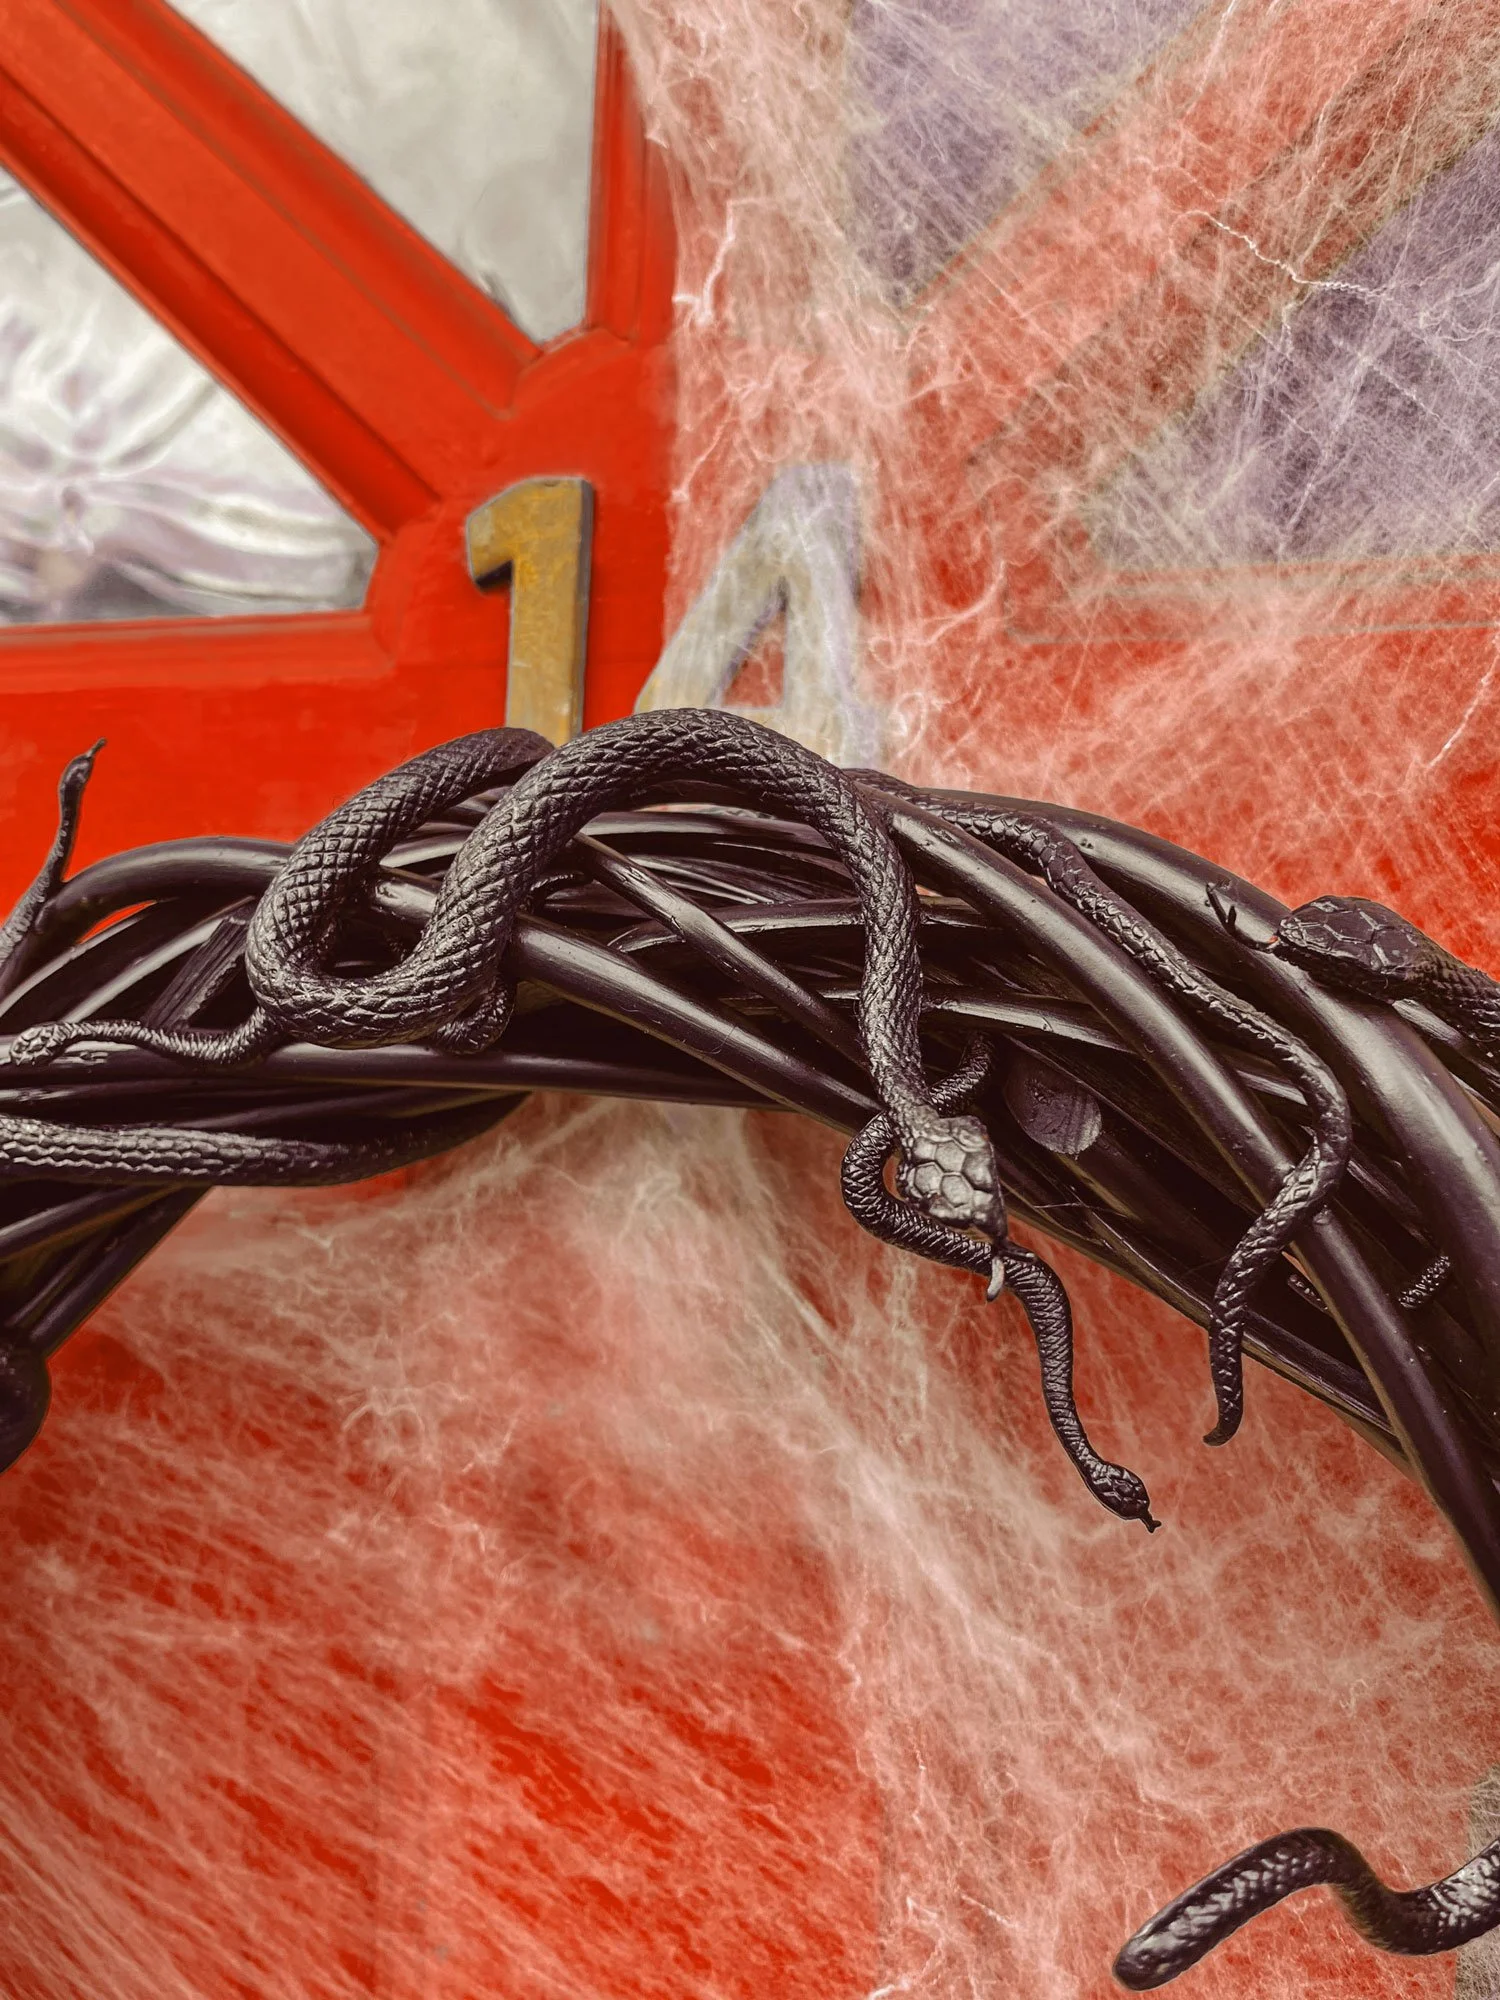
Halloween is my favorite time of the year because it means creepy decor, creative crafting, falling leaves and brisk weather. This is the first year I can decorate an outside area to entice trick-or-treaters and since I am an upstairs unit it really only means I have a front door to show off. This naturally meant I had to make a spooky wreath to hang.
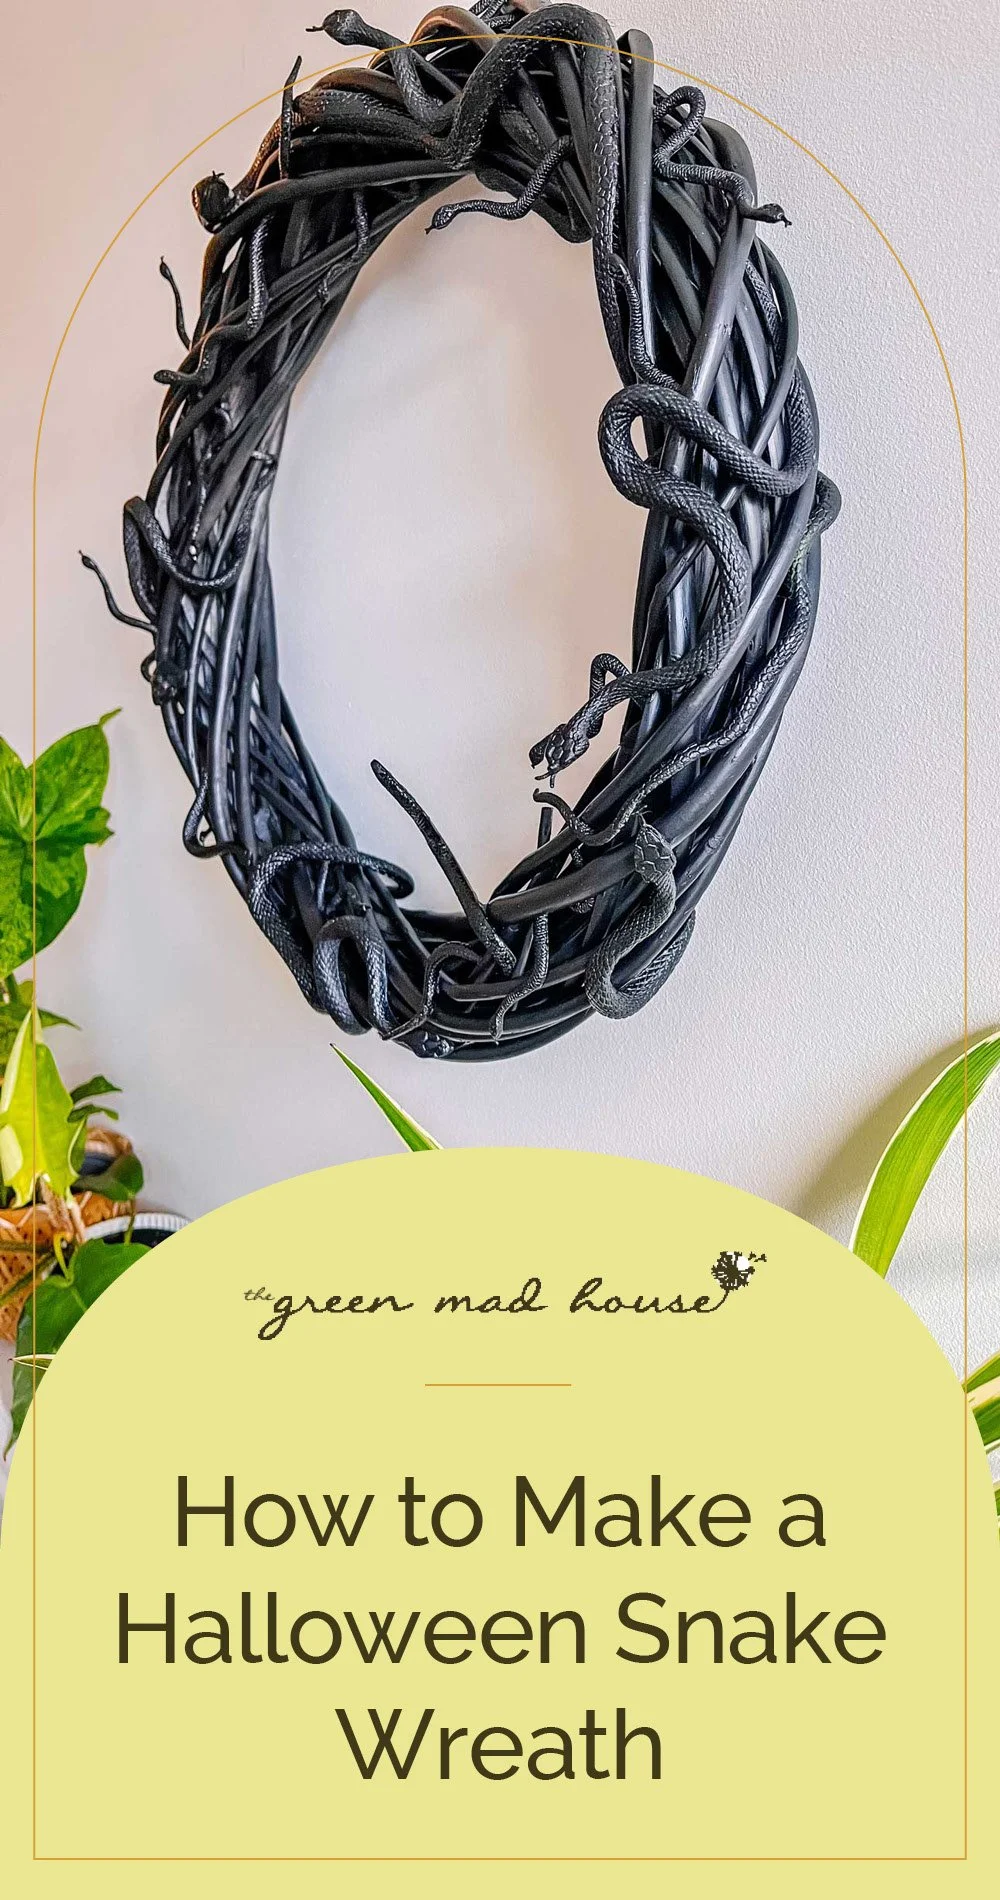
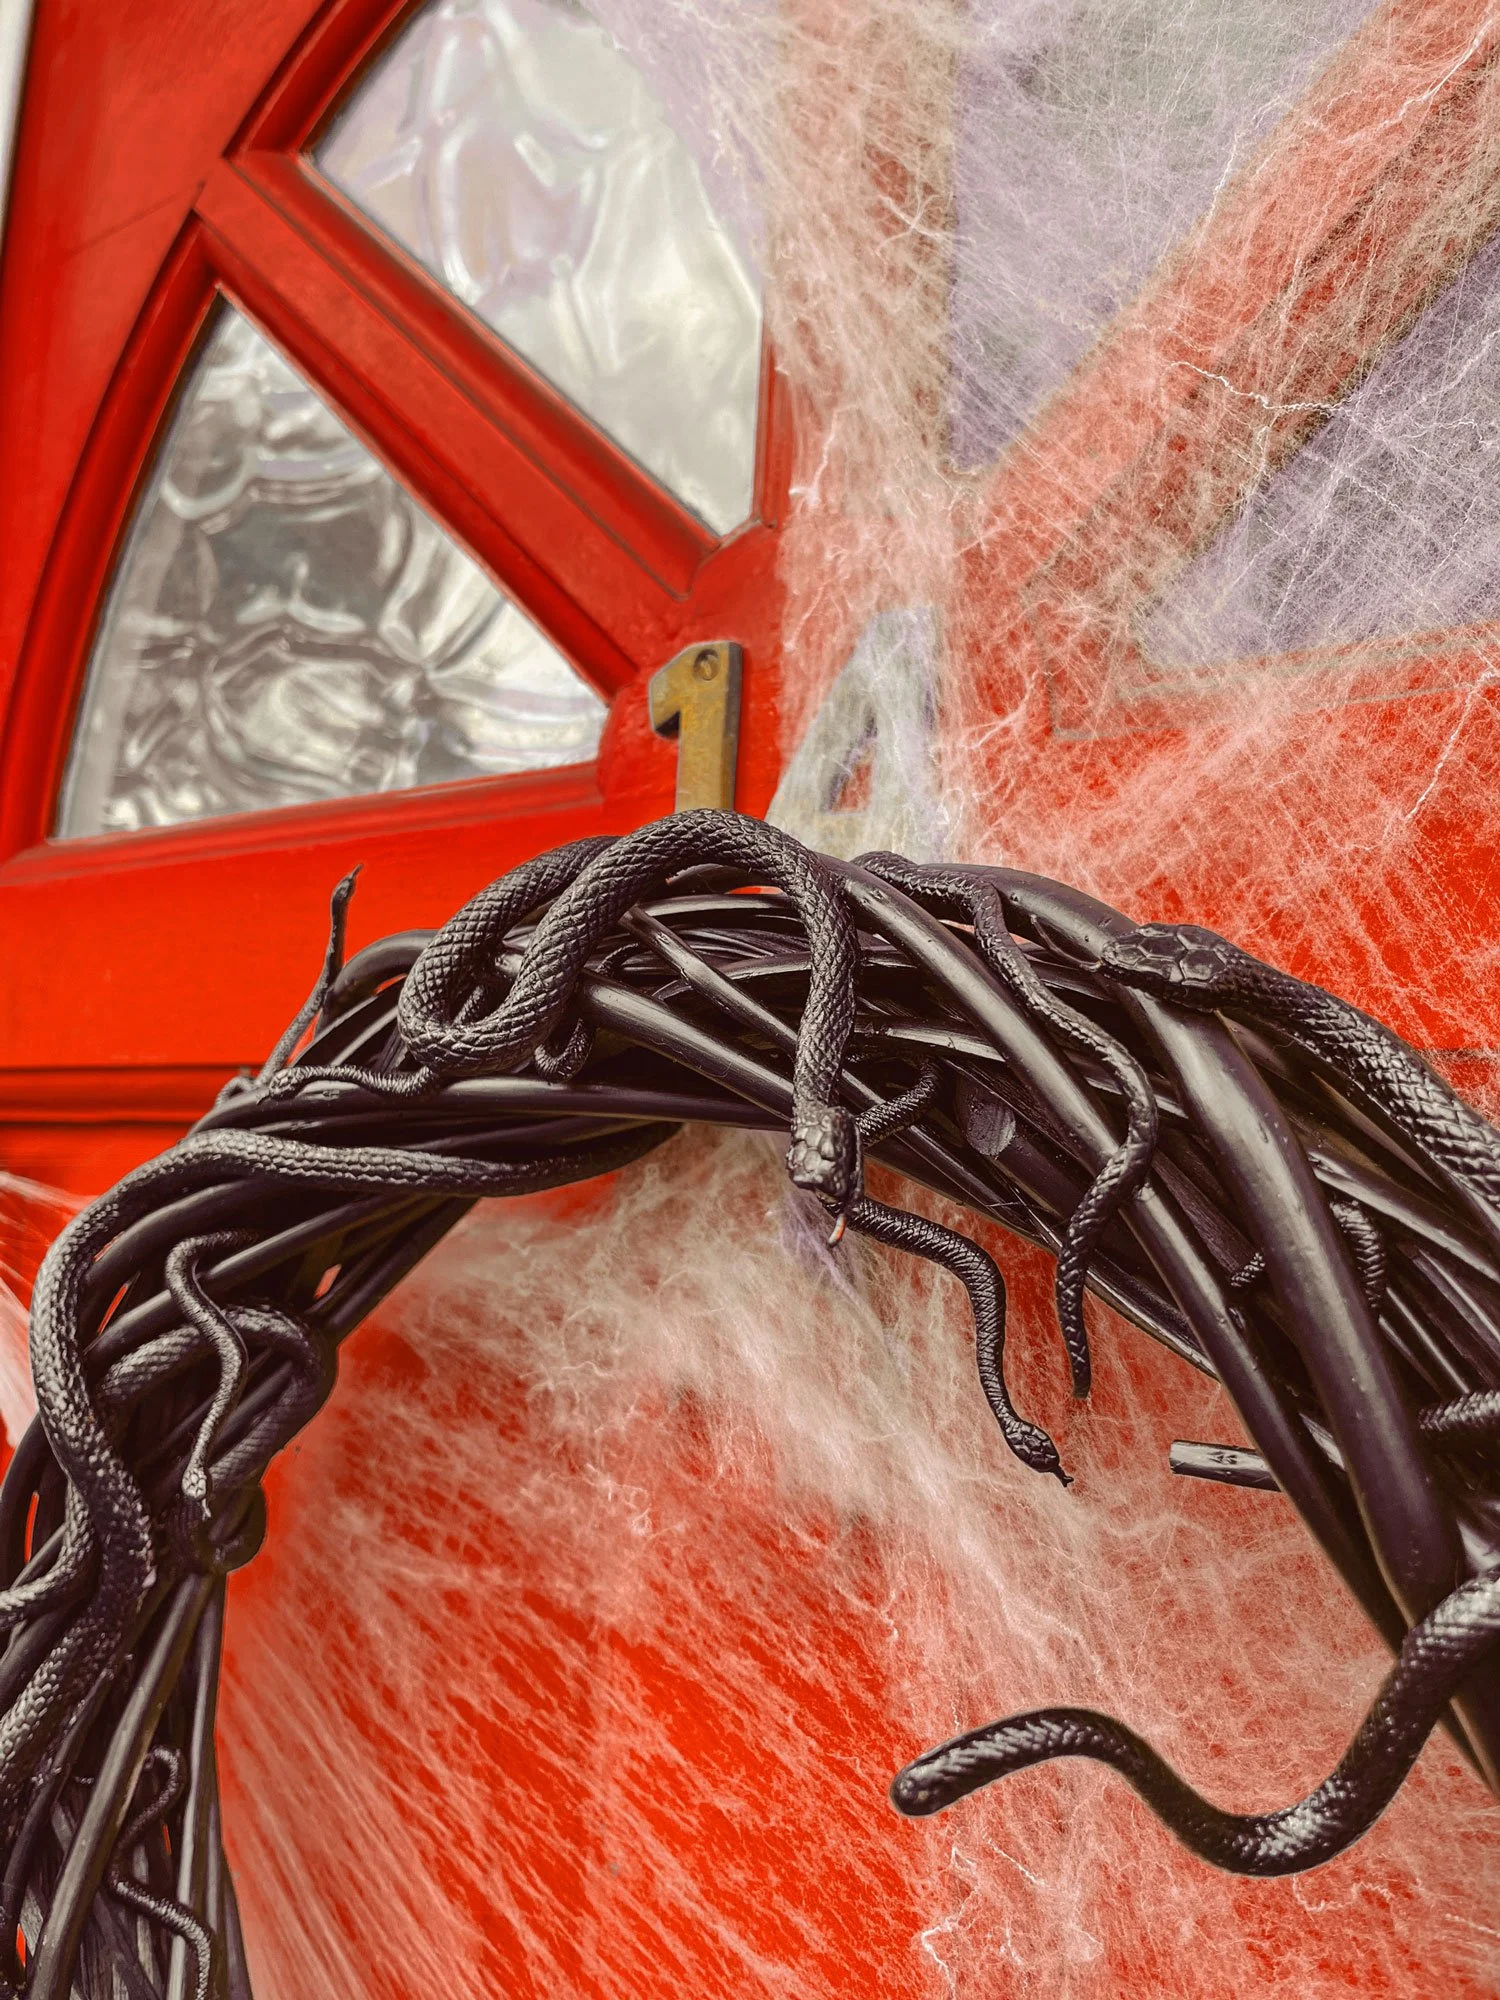
I have a lot of rubber snakes left over from a past Halloween DIY of spooky candy jars so I thought I would combine them with a willow wreath I found online to create a twisting, wreathing snake wreath. It is like Medusa meets Wednesday Addams. With the snakes of different sizes and the solid, glossy black finish, it feels high end and like the wreath is actually moving. This DIY uses few supplies and is extremely cheap, easy and quick to complete. Perfect for a rainy fall day to watch Halloweentown or Wednesday and craft.
I have a collection of Halloween DIYs if you are feeling creative and want to keep going!
Tips & Tricks
- Do not use hot glue. Hot glue guns do not work on the slick material of the snakes so instead you need a super glue. If you are making this with kids just avoid glueing any fingers together.
- Buying black or dark snakes saves time on painting. Due to the material of the snakes the paint rubs off so it can take a couple coats to get an even finish. Also the paint takes much longer to dry on these as compared to the wood of the wreath. Luckily the tiny snakes I purchased were already black but the big leftover ones I had were all bright green, red and yellow.
- Make sure to get snakes of varying sixes. I had one large one that was about 24in stretched straight, four that were 14in, four that were 9in, 2 that were 6in, and a ton of tiny ones. I even was able to mix in some with cobra heads and some with open mouths and tongues. The variety helps make it feel more complete and realistic.
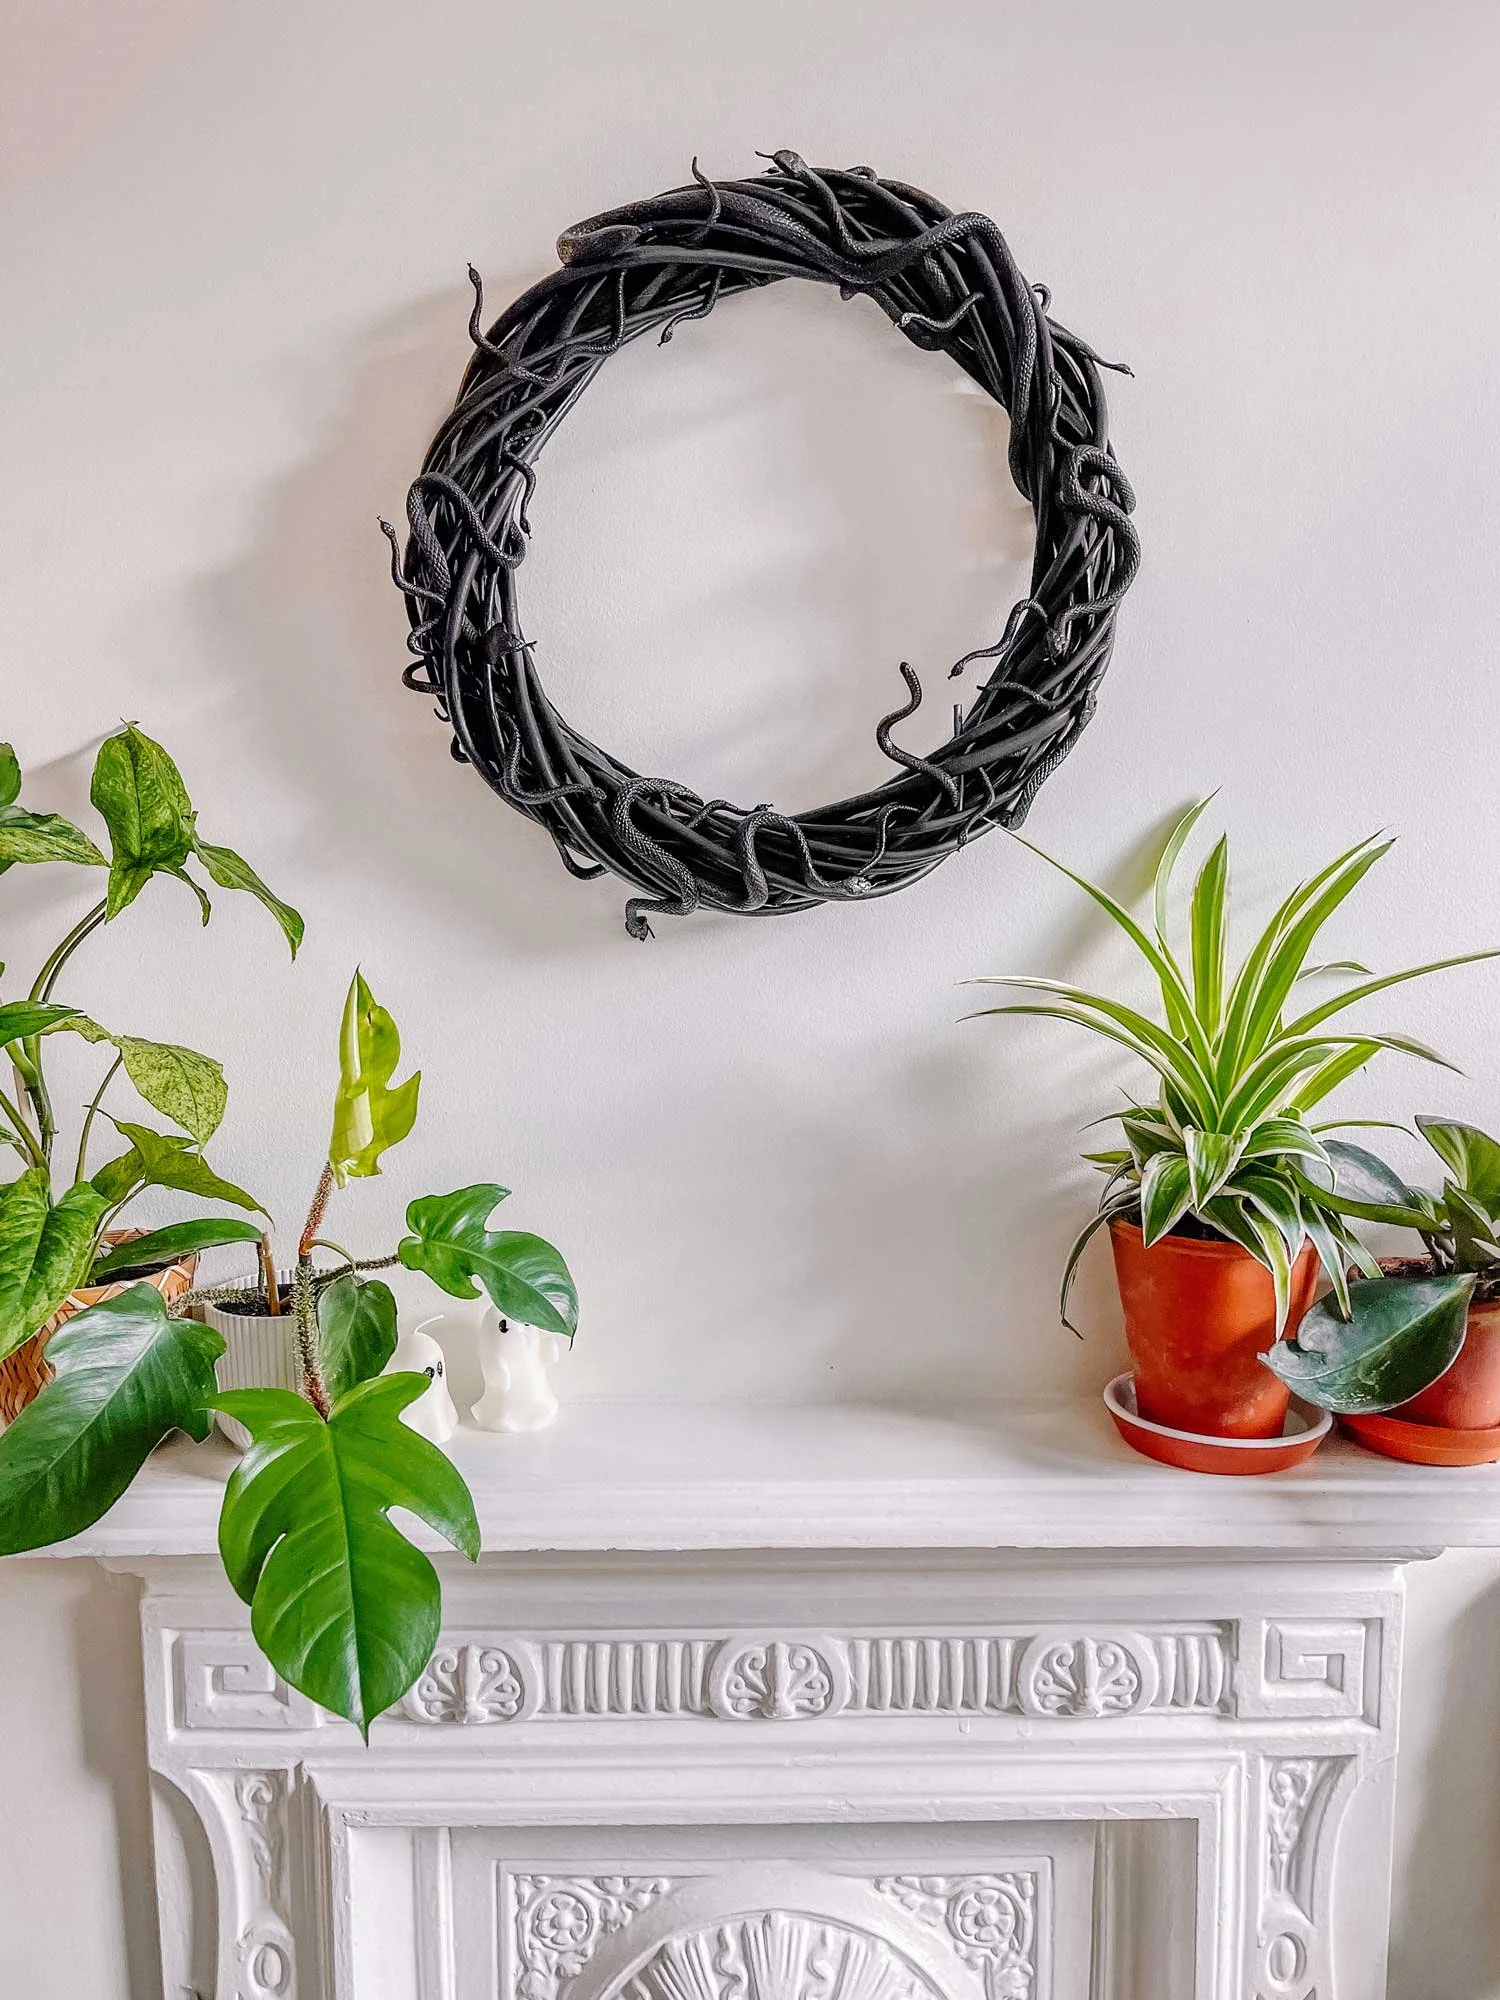
- If you live in an apartment or want to be able to admire your handywork all day, then pop it over your mantel. That is what I did most of the time until October 31st rolled around.
Which do you prefer? Mantel or Doorway?


If video format is more your speed, I made a compilation of the DIY for you to follow. I am going to try this on more of my blog posts. Let me know if you like it! Subscribe to my YouTube channel to keep up with new videos or my Instagram @thegreenmadhouse.
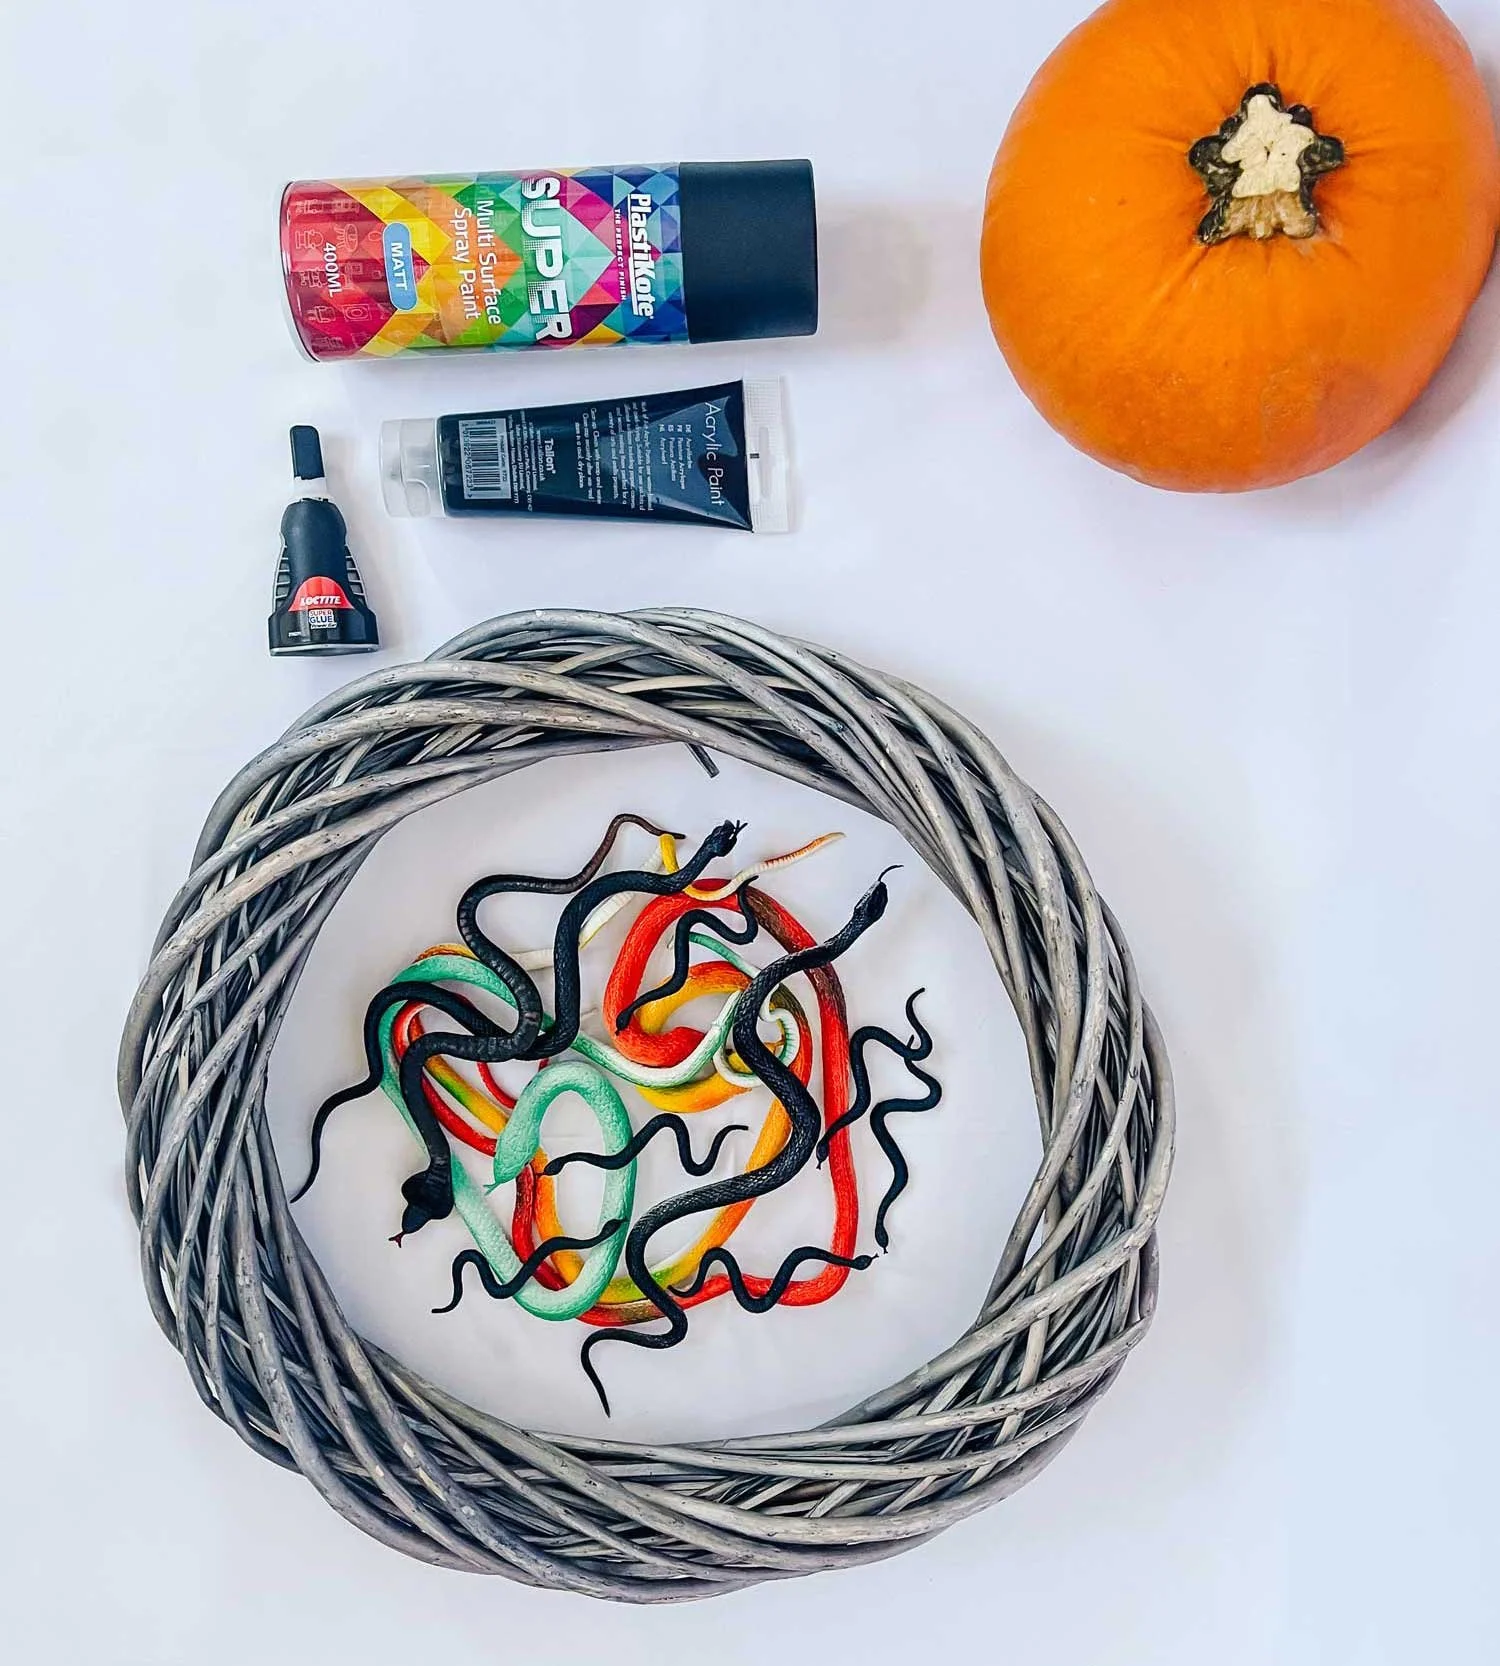
Supplies
Black Acrylic Paint (optional)
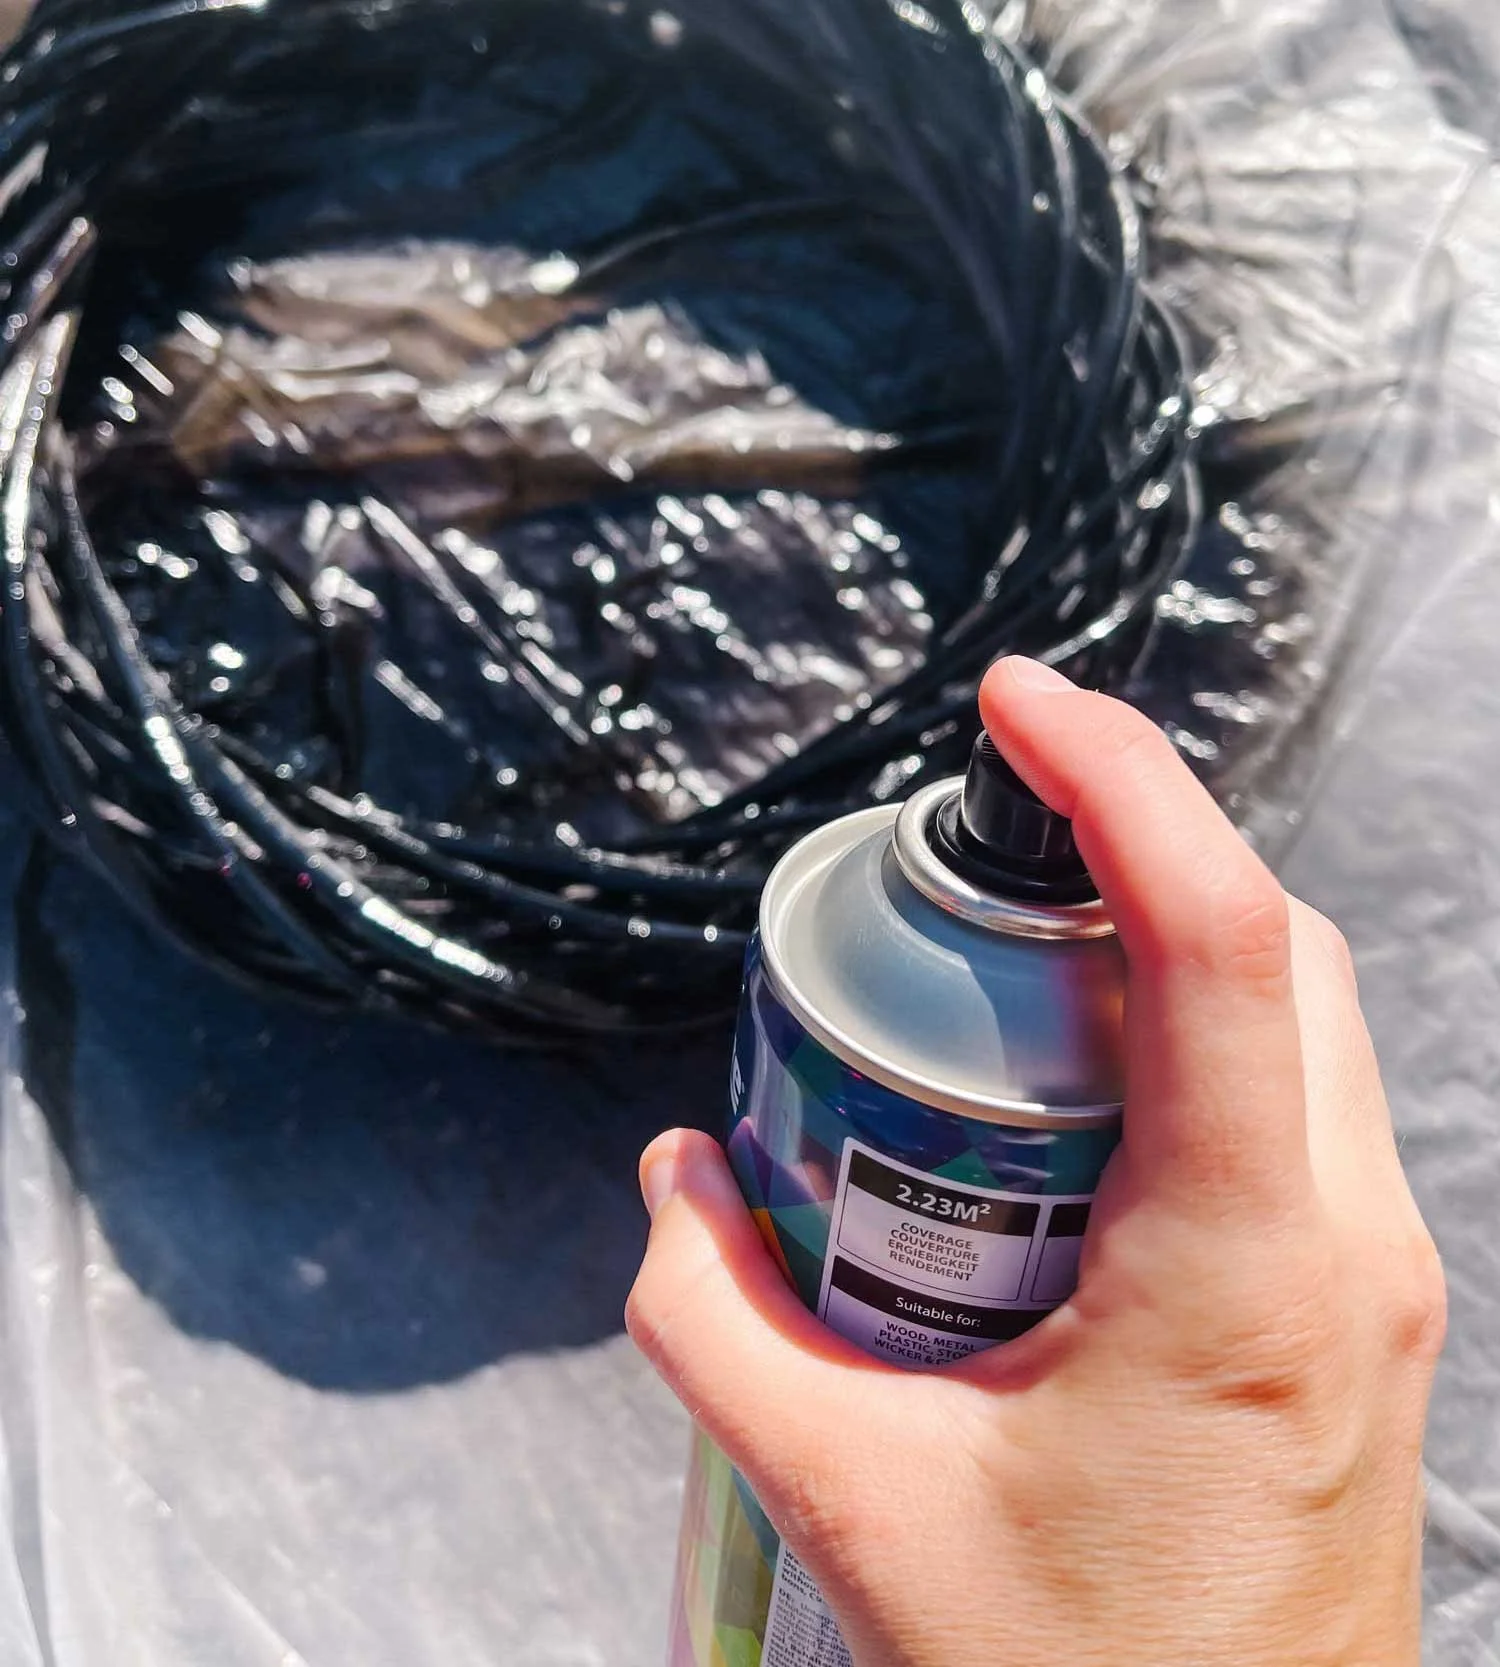
Paint Wreath
Spray paint your wreath outside or in a well-ventilated area like a garage. It doesn’t have to be perfect because we will do a second coat later.

Paint Snakes
Paint your snakes with acrylic or spray paint. It can be hard to paint these due to the material so it make take a coat or two on the brighter snakes. Let them dry for a long time.
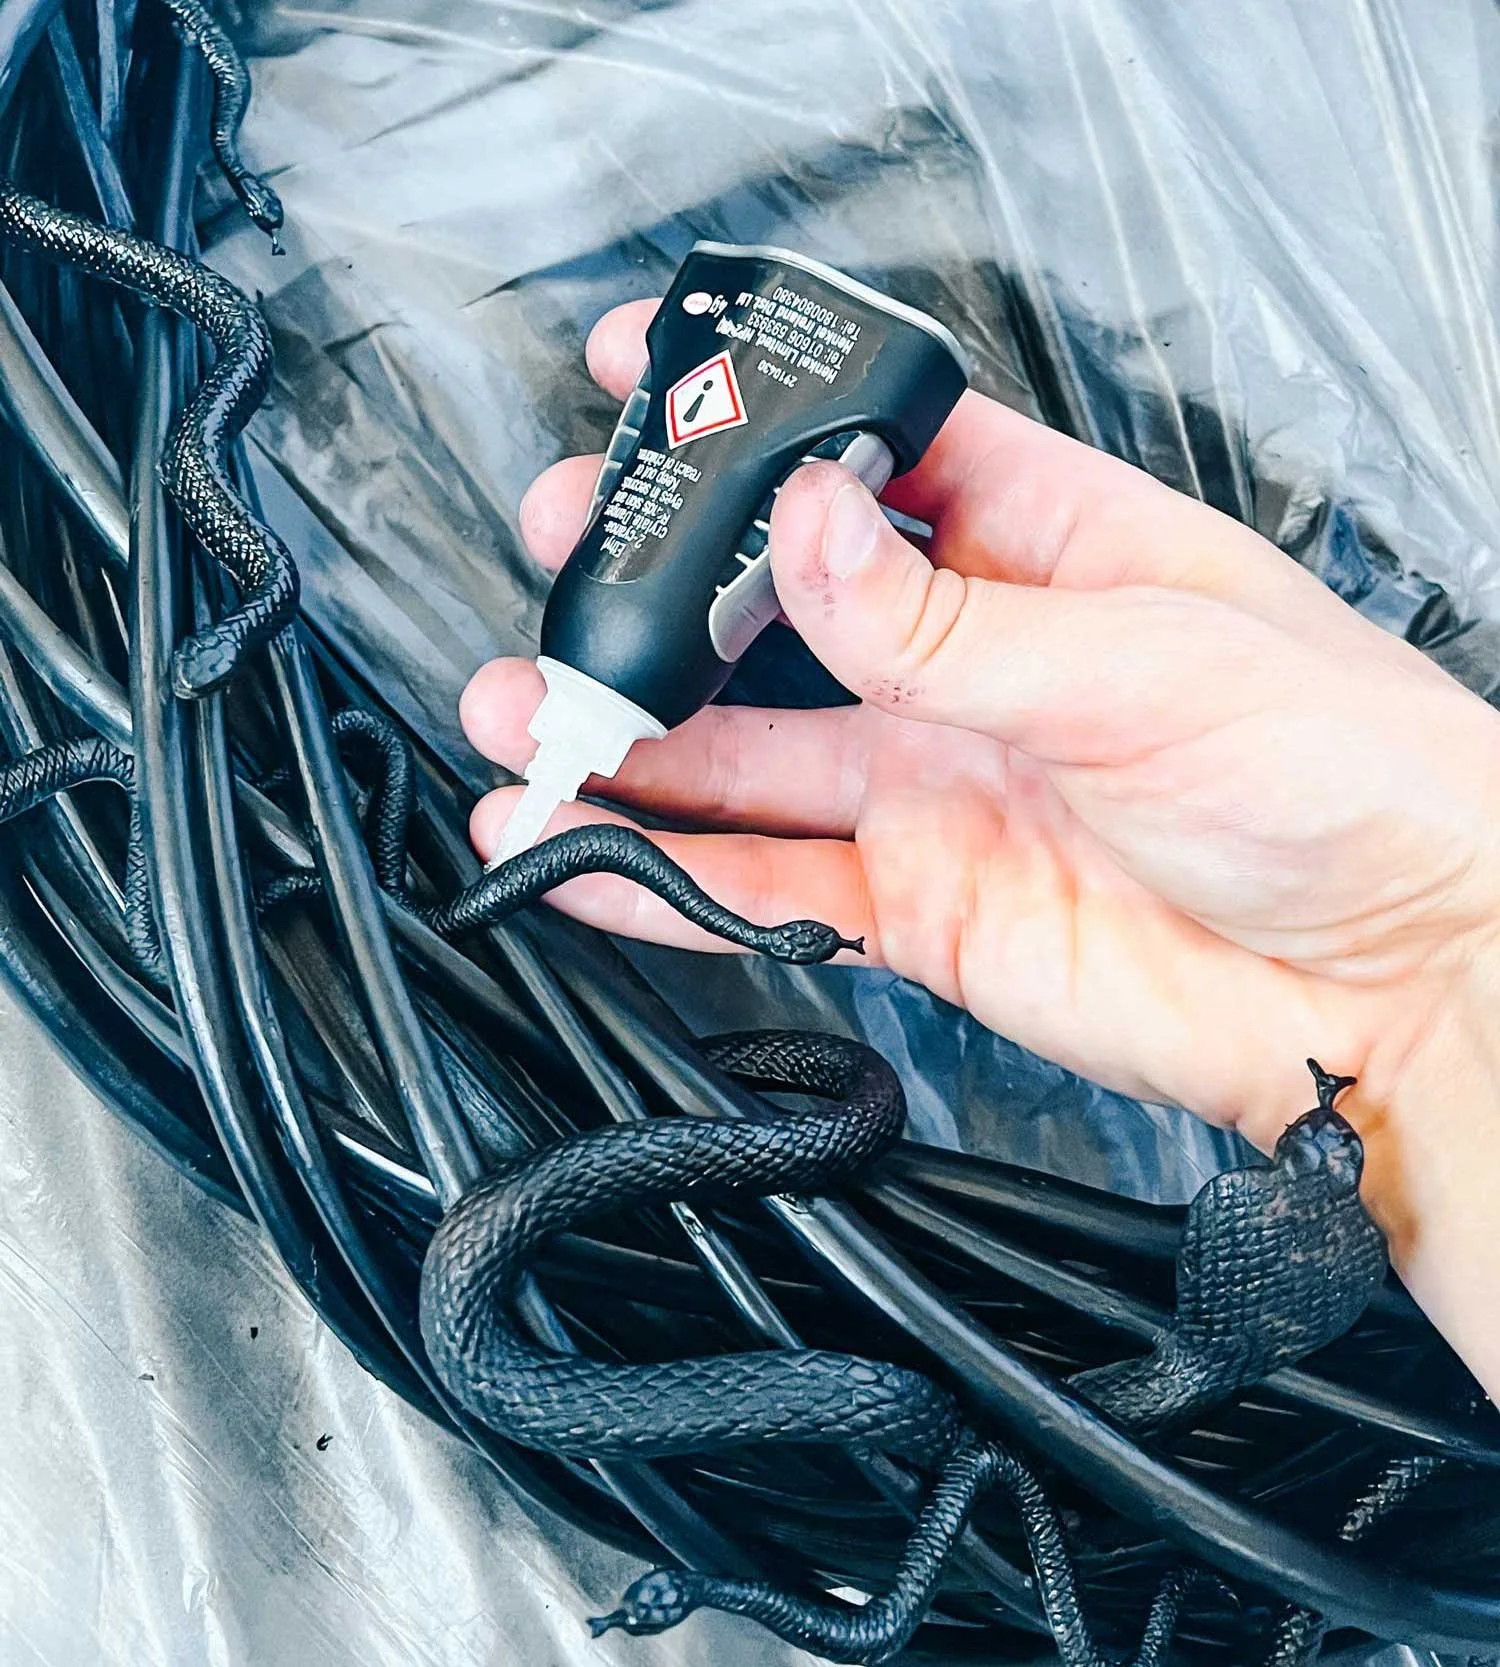
Glue Snakes
Add your snakes, weaving them through the wreath and glueing into place. Start with your biggest snakes and work down using the small ones to fill in.

Touchup Paint
Do one last coat of paint, covering up the original colors of the wreath and snakes that may have rubbed off.
Hang the Wreath
Use a command strip or a nail to hang your wreath and welcome Trick or Treaters to your home.
I have to say I am quite chuffed with this one. I love spooky decor and delighting trick or treaters and I have gotten a lot of compliments thus far. Add in some cobwebs stretched across your door to make the black of the wreath pop and throw on a few spiders. Let me know how yours turns out or by tagging me on instagram @thegreenmadhouse.

