How to Make a Spider and Bat Pom Garland
As an Amazon Associate I earn from qualifying purchases.

I decided to take my previous Pom Garland DIY and spook-ify it for the Halloween season by turning the poms into spiders and bats. Halloween decor is always so much fun and this option is cheap, quick and easy for adults or kids to make. For many we are uncertain of how Halloween and trick-or-treating will present itself this year but that doesn’t mean we still can’t decorate the inside and outside of our houses.
With the onset of fall meaning time swaddled in fuzzy blankets watching movies, this DIY is perfectly suited for couch sitting as it just requires a lot of yarn wrapping and a little glue. When finished, string your garland across your fireplace, around a door frame, on a curtain rod, down a railing, or just hang it on your wall. My entire strand ended up having seven total creatures and a length of 6 feet and really added some texture to the brick behind my wood-burning stove.
I will be doing quite a few Halloween DIYs over the next few weeks so check them out! Don’t want to make this? I’m selling it on my Etsy Shop along with the eyeball plant stakes also seen below.
Tips & Tricks
- When purchasing your wire make sure it is one you can bend but is still strong enough to hold shape. I originally searched through the jewelry aisle and the thicker wires were impossible to bend so I headed to the floral aisle and discovered the perfect one.
- I have provided bat wing templates for you for a variety of different pom sizes. I went with a 3.5” pom with a 5.5” wing.
- When laying out all your poms to connect them I suggest using a tape measure stretched out and locked. I wanted it to be 6 feet long so I stretched my tape measure out in the living room to about 75” and set each pom down the line: one at 0, one at 1 foot, one at 2 feet etc. This allows for even spacing when you start to tie them together.
- If you want to add some character to your pieces, googly eyes are always a fun option and popular with the kiddos.


The following steps are the same for both the spiders and the bats. Later we will separate out the two.

Supplies

Assemble Pom Maker
I used the 3.5” size. Align both sides of your pom maker so that they are a reflection of each other.

Wrap Yarn
Holding the maker and the end of your yarn in one hand, wind the yarn around one pair of arms.

Wrap Yarn
When one side becomes bulky, cross over to the other side. You will know when to stop when you can barely close the arms together.

Close the Pom Maker
Close both sides together and lock the latches. Cut the strand of yarn that is still attached.

Cut Wire
For the spiders you will need four 10” pieces. For the bats you will need one 10” piece.
This section highlights the Spider:

Bend the Legs
At about the 2.5” inch mark on each side of the wire, create a bend. This represents the legs of the spider. Repeat on the other three pieces.

Insert Legs
Insert all four legs through the middle of the pom maker.

Adjust Legs
I bent the front and the back legs in the middle, where it sits in the pom maker, to create a V shape. This allows the legs to not overlap eachother and look natural.

Glue Legs
To ensure that the legs don’t slide out or move, I placed a small amount of glue on each side.

Cut Pom
Cut open the pom along the crack between each side of the maker.

Tie Off Pom
Cut approximately 6” of yarn and wrap around the center opening. Tie a knot, pulling it tight so the yarn slides between the makers. Knot again to secure.

Trim Pom
Release the arms and remove. Trim the edges so it is an even shape.
This section highlights the Bat:

Create Batwing
Using my template, cut out a bat wing. I used the 5.5” wing. Fold your felt in half and attach the wing at the fold (I just used a clip). The loose side should be at the bottom, We want our wing after cut to be double sided like a hot dog bun!

Cut Out Wings
Cut your wing out of the felt and then repeat again so we have two wings.

Glue in Wire
Using our 10” piece of wire, place it all the way up the centerfold of the wing and glue it and each side of the wing together.
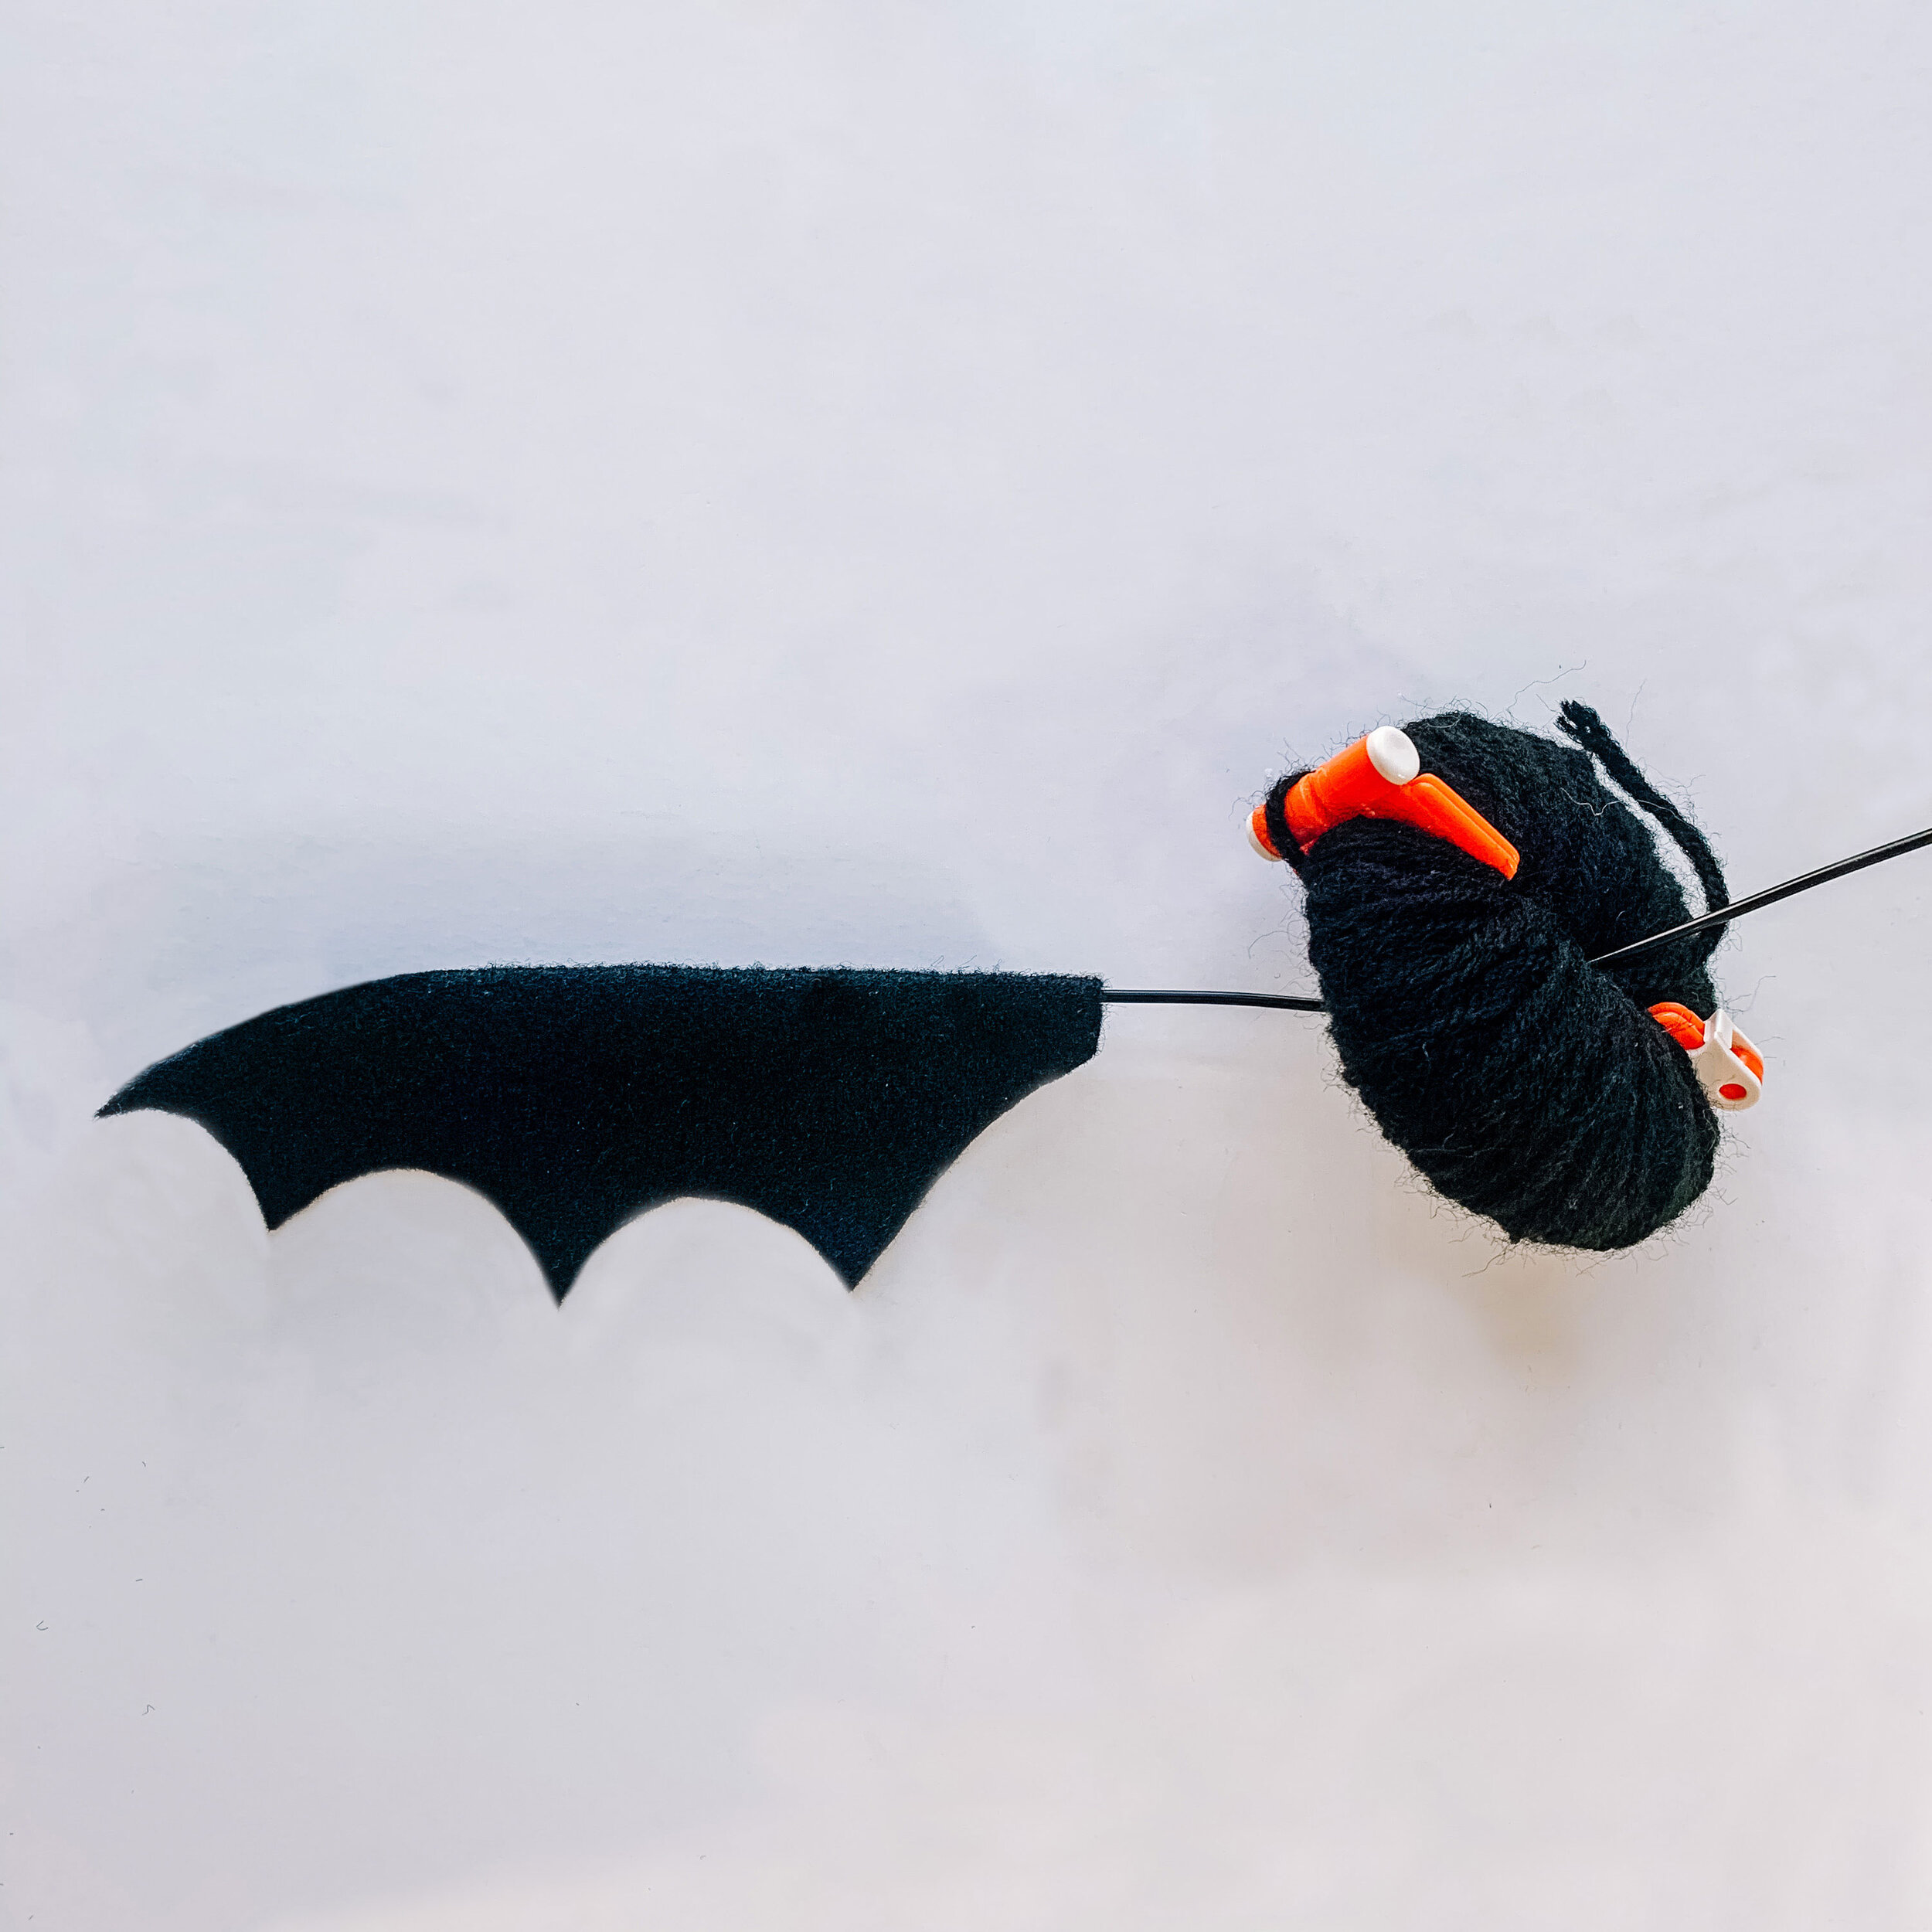
Insert Batwing
Insert the wire through the middle of the maker.

Attach Batwing
Attach the second piece of felt wing onto the other side of the wire.

Glue Batwings
Bend the wings at the center point into a slight V. Place a small drop of glue on each side to secure them in place.

Cut Pom
Cut open the pom along the crack between each side of the maker.

Tie Off Pom
Cut approximately 6” of yarn and wrap around the center opening. Tie a knot, pulling it tight so the yarn slides between the makers. Knot again to secure.

Trim Pom
Release the arms and remove. Trim the edges so it is an even shape.
Repeat!
Once you have the amount of spiders and/or bats that you want you can move forward to the next step. I did four spiders and three bats for my pom garland.

Connect Poms
I wanted a 72” long garland so I cut a 84” piece of yarn. Loop it around each pom, tying a knot twice to secure it. Cut off excess yarn.
Alright now we have a finished string of garland so we have to hang it! I used tiny command strips at the ends and middle of the brick and draped the string across it. The poms are so large they cover the command strips perfectly so you can’t tell how they are hanging. I have to say I am really happy with how it turned out and it barely took take any time. I started watching the show Ratched on Netflix which is based on Nurse Ratched from One Flew Over the Cuckoo’s Nest and this garland took just over one episode to make and of course gave me the spooky vibes I needed.
I think when winter rolls around I am going to make a Christmas pom garland for my tree. One can never have too many poms. Hope you have fun with this one! Let me know in the comments how yours turns out.


