How to Make a Clay and Yarn Wall Hanging
As an Amazon Associate I earn from qualifying purchases.

Try the Pom Garland DIY!
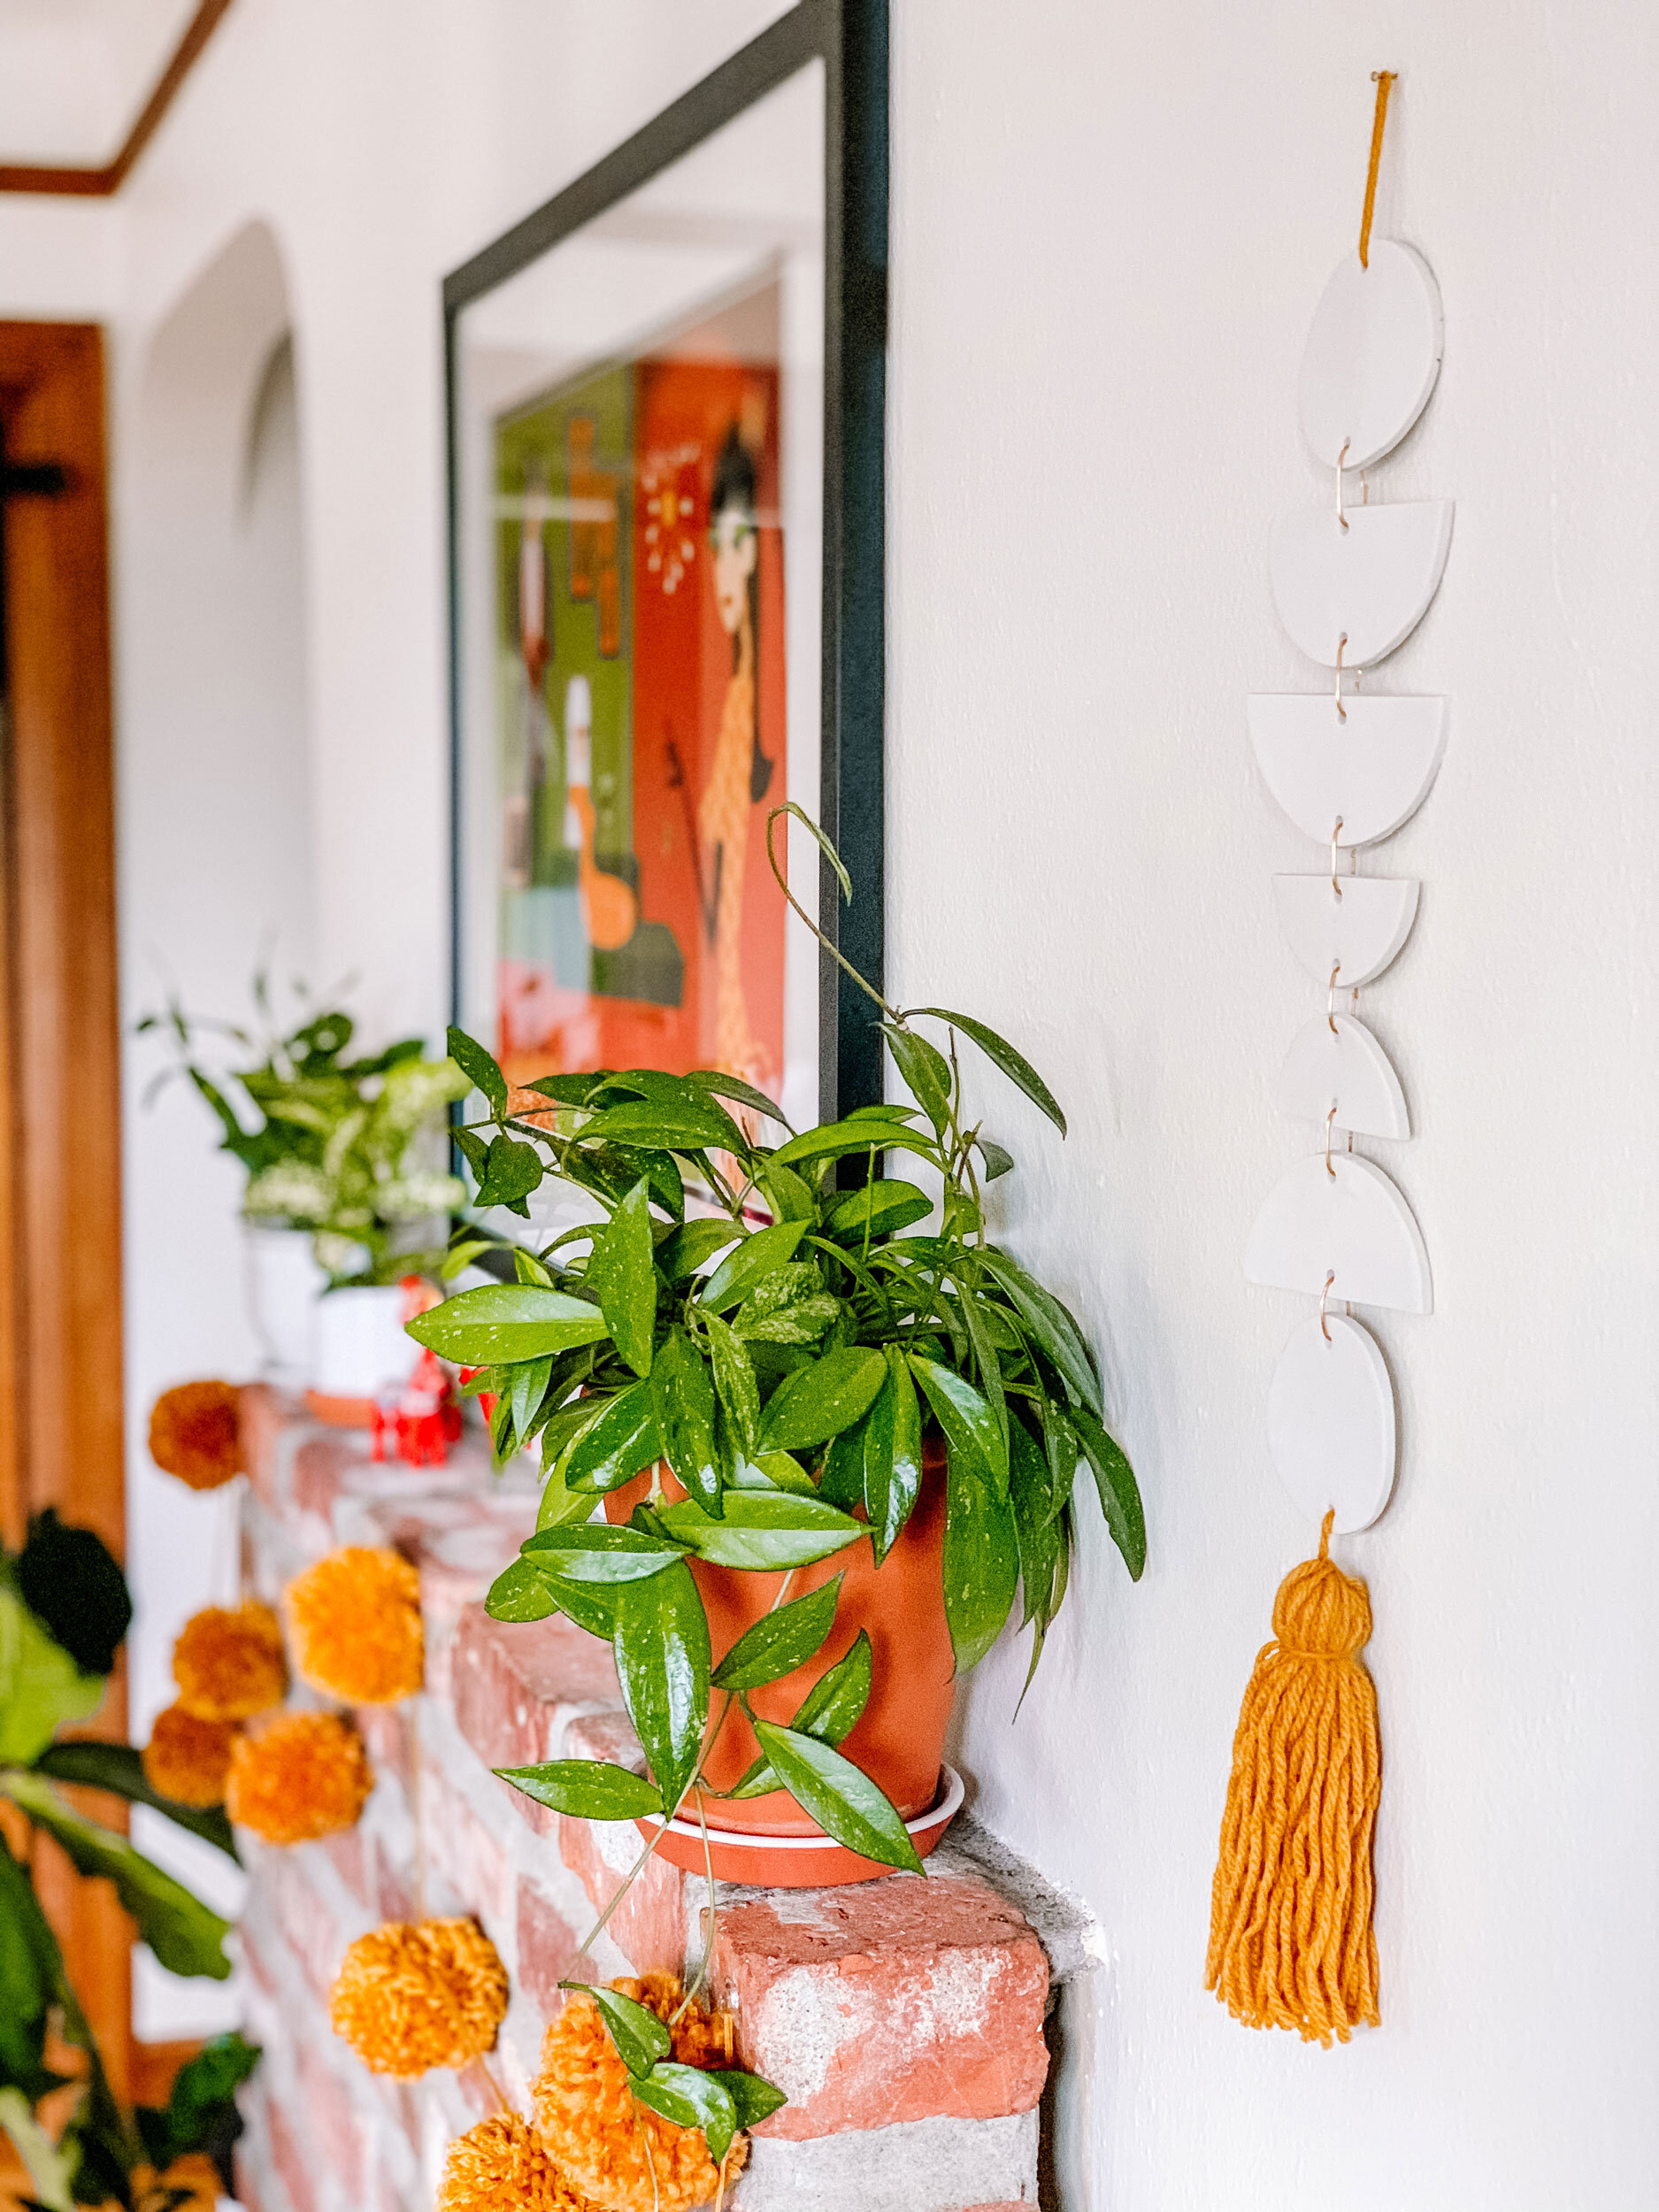
One of the easiest ways to add some DIY flair to your walls is with a clay and yarn wall hanging. My house has a lot of art in it but using wall hangings made out of macrame, yarn, clay, wire, or wood is an excellent way to make your space feel more natural and eclectic. Due to the long and skinny nature of these hangings, they are excellent for that narrow wall you don’t know what to do with, above light switches, or even hang it off your door handle (if you don’t have cats).
This project is so easy and you will instantly receive compliments asking where you got it. I decided to use leftover clay from my clay keychain DIY and some leftover yarn I had from my macrame and yarn basket DIY which means this project cost $0! I went with yarn because I think it gives it a really warm, boho feel. Using the half moon shapes on the clay adds a mid century flair and bam, you have the essence of my home.
Tips & Tricks
- If you don’t have wire, you can use the yarn you already have to connect your pieces.
- Use a metal ruler when cutting your clay. If you have a wood one you can actually slice bits off with your knife/exacto accidentally.
- Ideally your clay would be 1/4” but any thicker you need to increase the bake time. Keep the oven temperature the same. Low heat prevents burning.
- If you want your clay to have a shine, use some gloss glaze on it after it is done baking and cooling.


Supplies

Roll Your Clay
Roll the clay in your hands and knead it to get it soft. Roll it out using a rolling pin to 1/4” thickness.

Cut the Clay
Use a cookie cutter (or exacto knife traced around a cup) to cut out a shape from the clay. I had three at 2.5” and two at 3.25” in diameter.
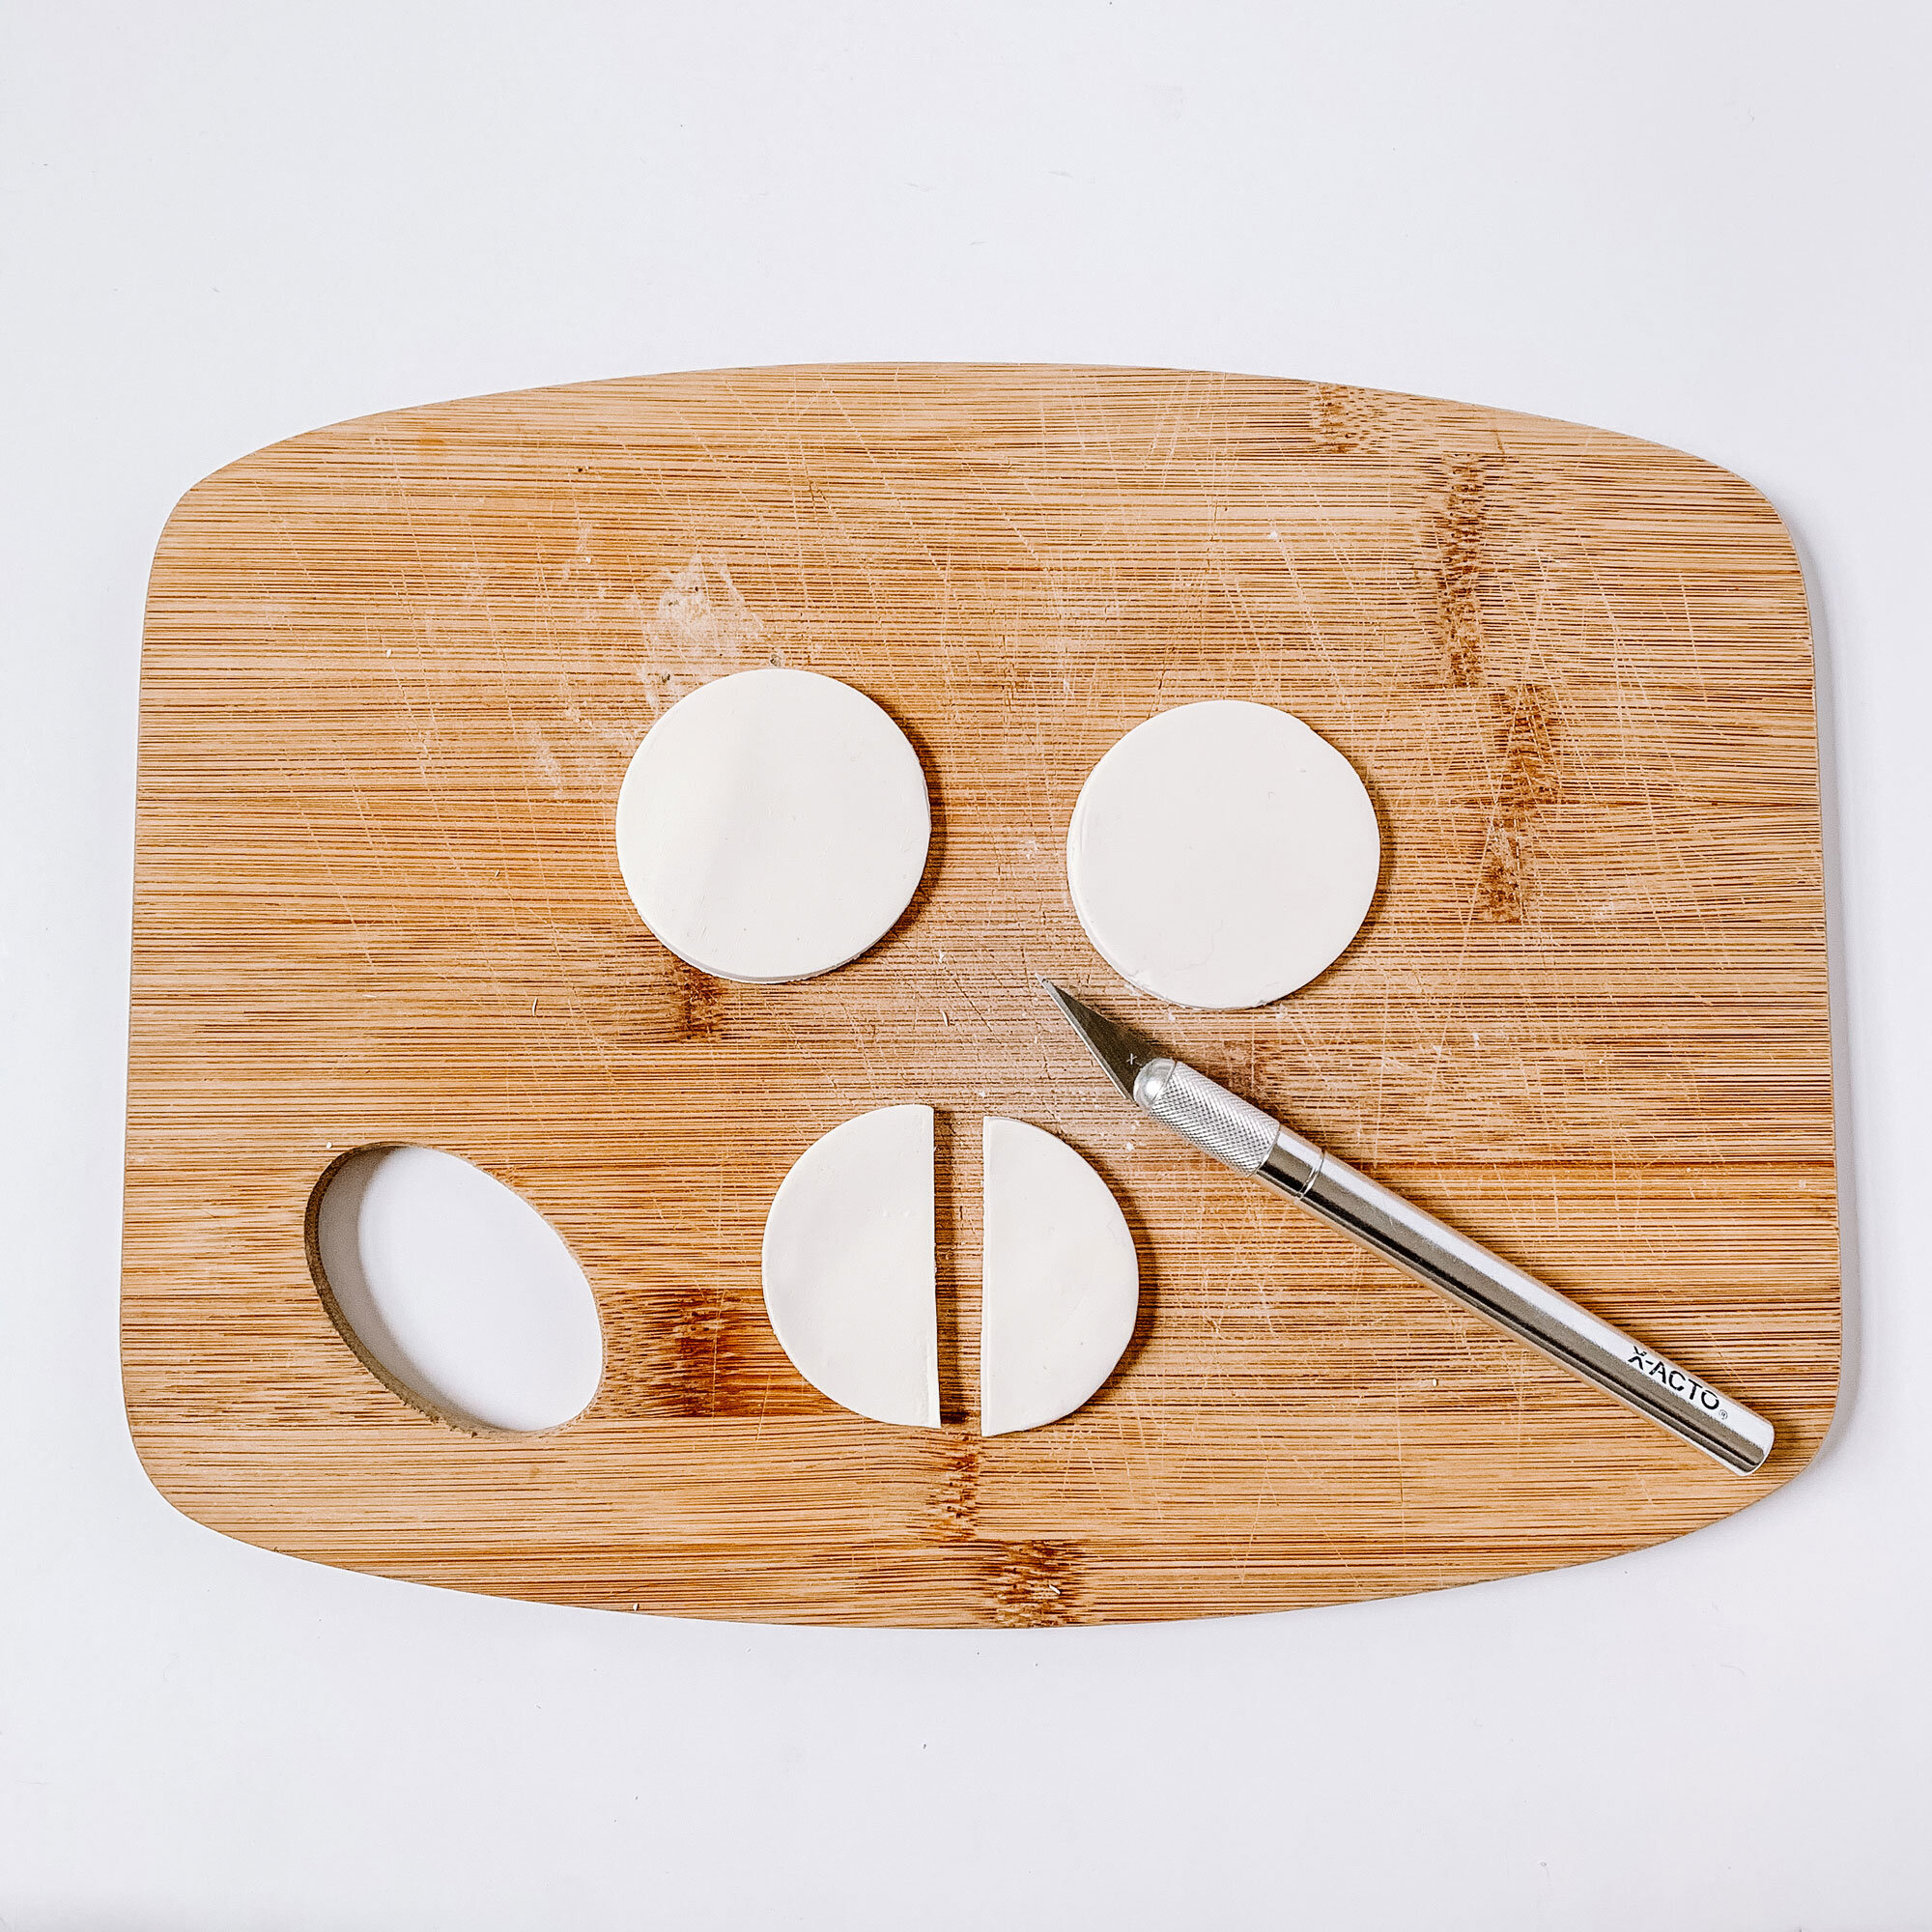
Cut Circles in Half
Cut both of the 3.25” circles in half using a knife or exacto and a ruler. Cut only one of the 2.5” circles in half.

Punch the Hole
You can use clay tools, an exacto or even a back of pen to bunch your hole. Mine was about 1/4” across.

Bake Clay
Preheat your oven to 275°. Place your clay in the foil pan and then place another foil pan upside down on top of it to create a lid. This keeps your clay from burning. Bake for 10 minutes.

Sand Clay
After your clay has cooled. Lightly sand out the imperfections.

Loop Yarn
Loop your yarn around your hand. The more yarn the thicker the tassel. My tassel was 6” long when finished so I did about a 7” loop as we will trim the ends.
Put a single strand through the center of the loop. This is the top.

Tie-off Yarn
Wrap a single strand about an inch from the top around your tassel. Knot securely and let strands fall in with your other yarn.

Knot Your Yarn
Now knot the top piece tightly. This will give the top a nice round bun.
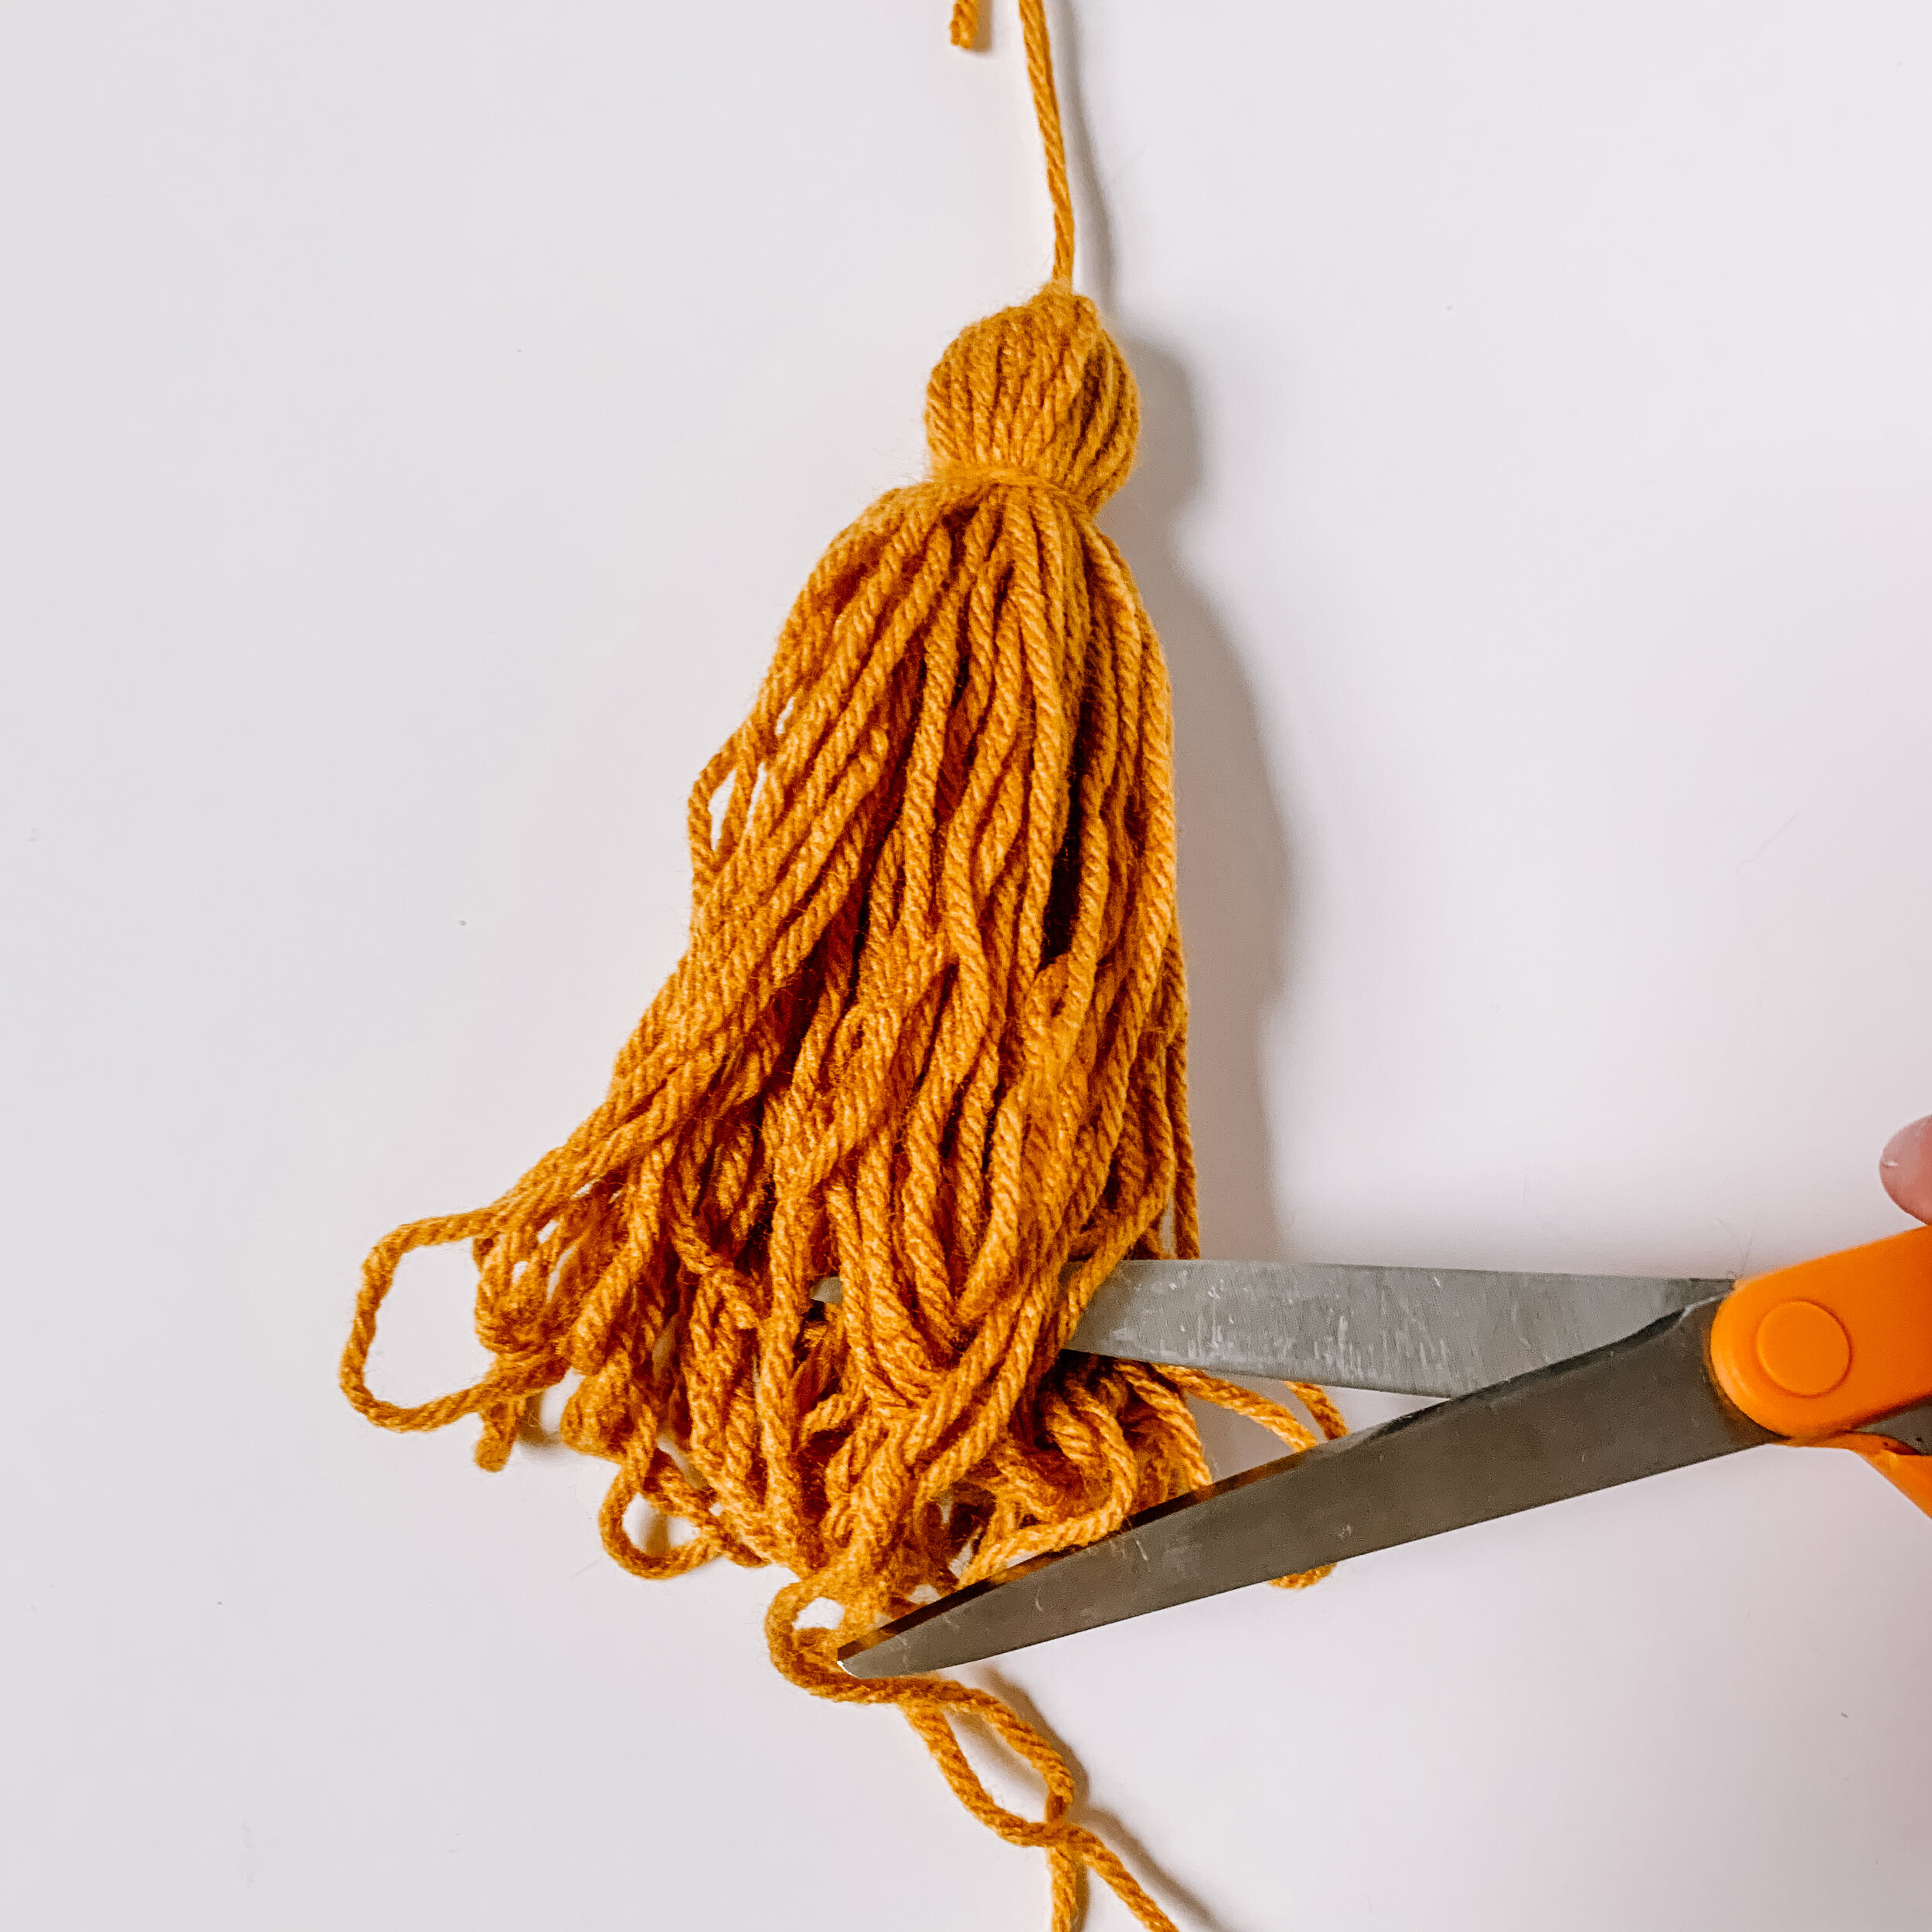
Trim Yarn
Cut the bottom loop so all the strands are free. Then trim them so they are even.

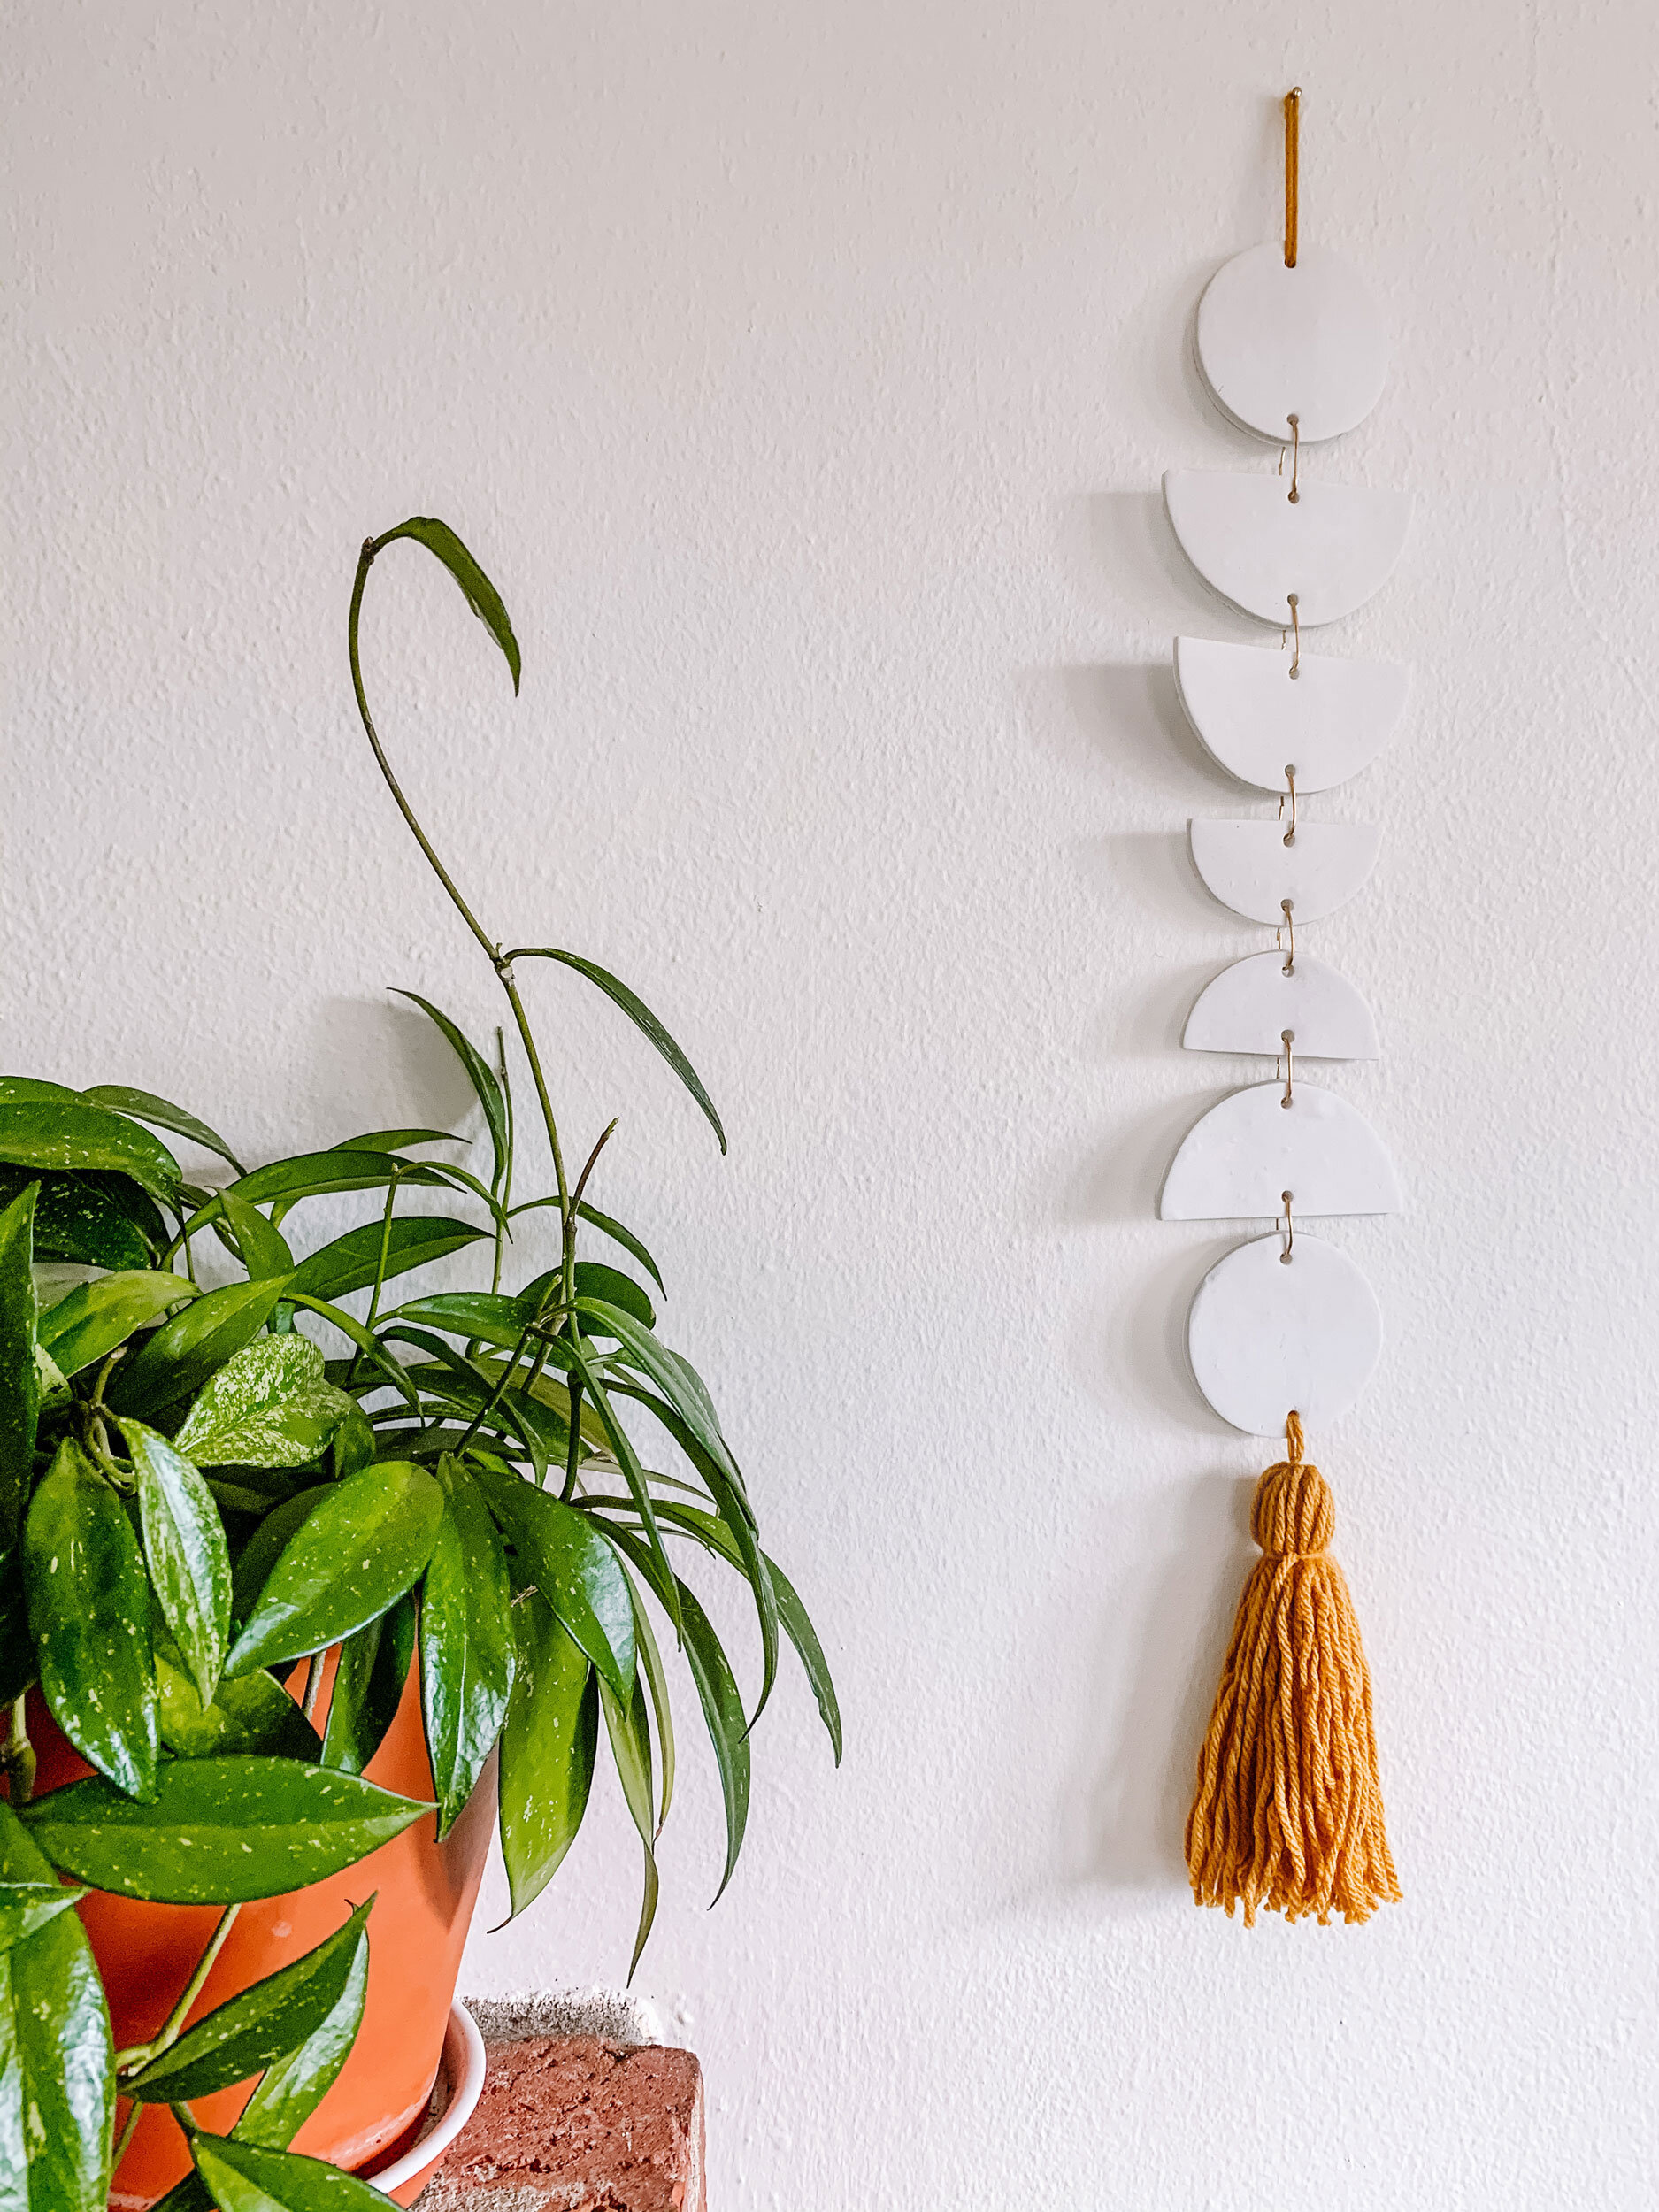
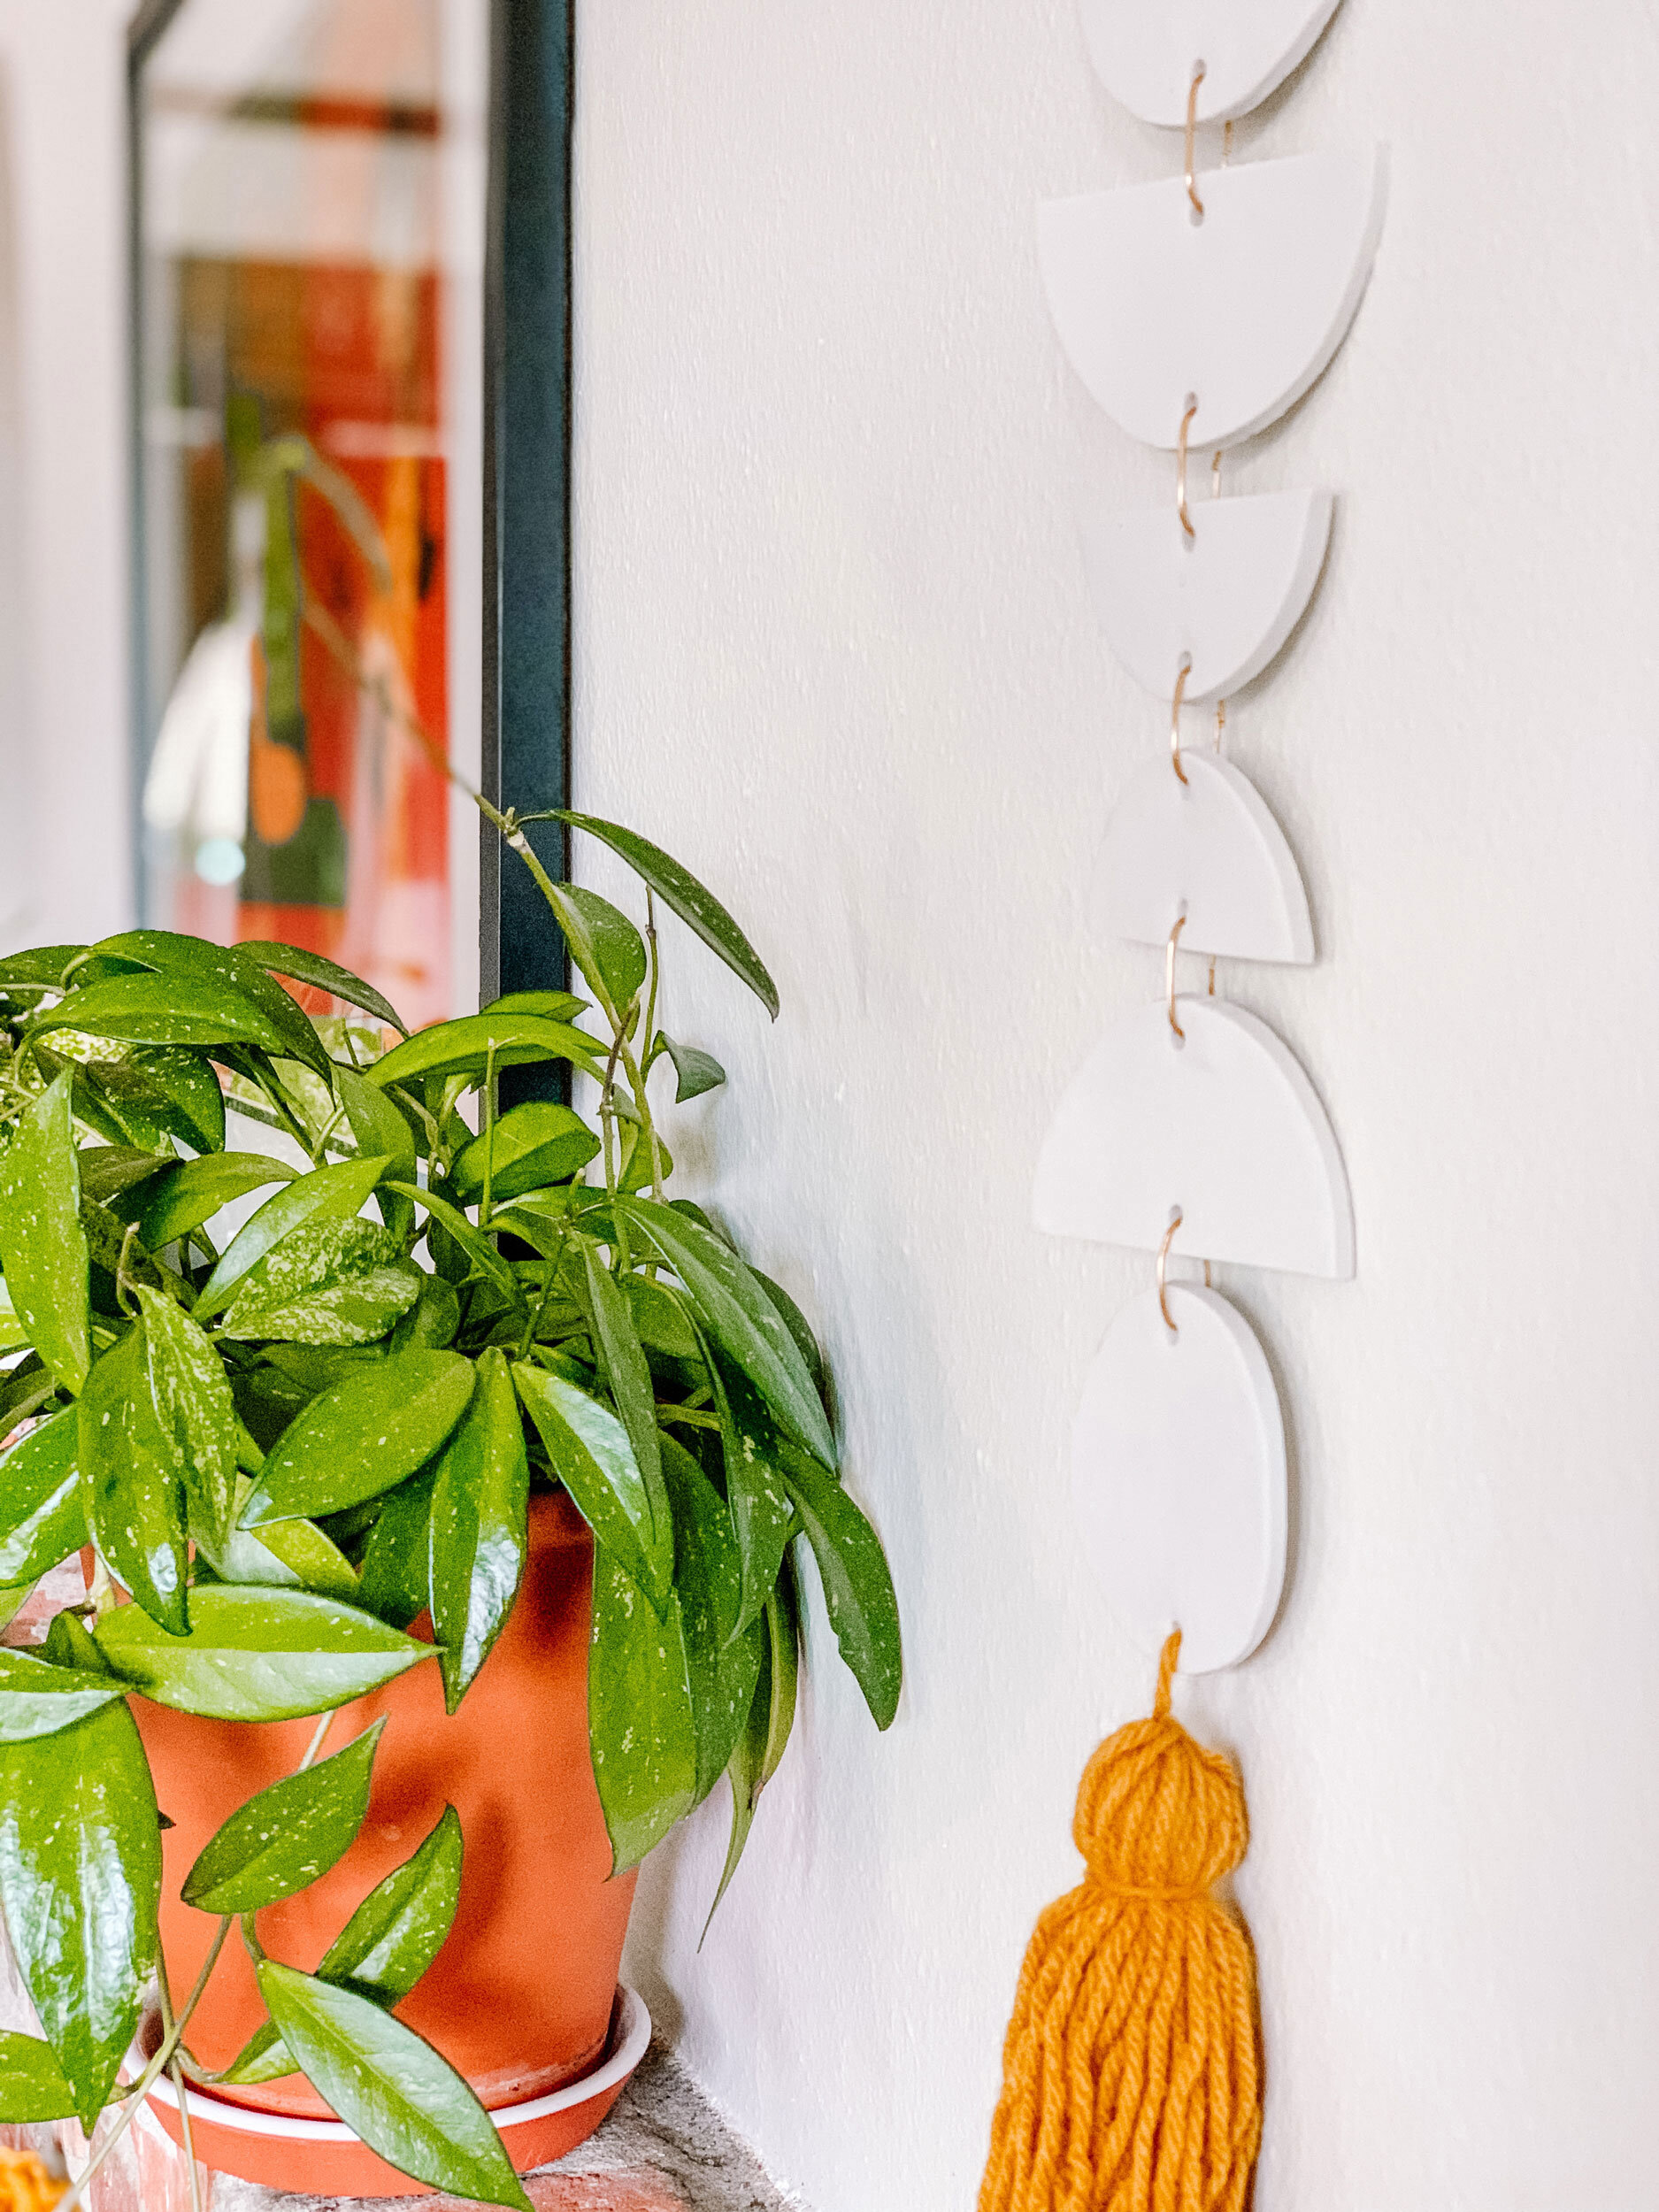
Create Your Layout
Deciding on your layout is important. Make sure it feels balanced. Here is what I went with!

Wire Clay Together
Cut approximately a 1.25” piece of wire. Using your pliers, bend the pieces through the holes in your clay. Where the wires meet will be the back of your piece.

Attach Tassel
Loop your excess yarn through the last hold on the bottom piece of clay. Knot and trim excess.


Attach Yarn Hanger
Using a scrap of yarn, loop it through the top hole and knot it off. Trim excess.
I love being able to use leftover scraps from other projects and turning it into something pretty. This hanger can be used in so many places that I am not even sure this is where I will keep it. What do you think?
Originally I had planned on doing a terracotta colored tassel but ended up going with the mustard color since the pom garland and the macrame and yarn basket are right next to it. I think it ties everything in nicely. Also at any point I could easily change the tassel out if the color scheme in my room changes or a tassel gets chewed on by a cat (I put nothing past them).
I hope you all have fun making this. Let me know in the comments how yours turns out.